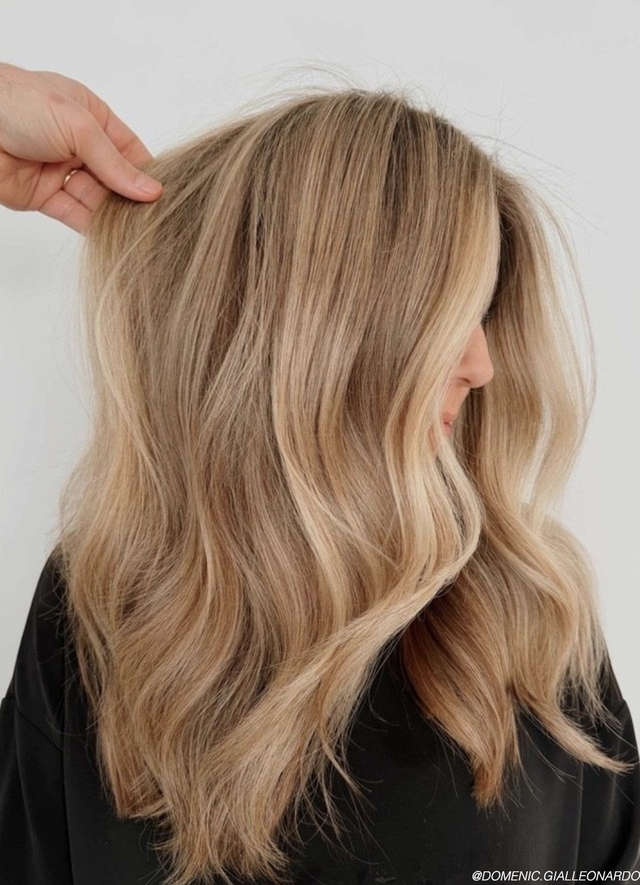
With over 70 million active daily users, Instagram has become one of the fastest growing and popular social media platforms today. It’s an easy way to show your friends, family and others your story through photography. It’s also become one of the most popular platforms for hair inspiration. From pixies and braids to color work, it’s quite possibly the fastest way to grow your personal brand and salon business!
Instagram gives all hair artists a platform to show potential clients exactly what they are capable of. But there’s more to it than snapping a quick picture and posting it to your Instagram. If you want to stand apart from the rest, you need to take time to set up the shot. By taking different angles, mastering composition and creating a consistent style, others that view your work will know that it belongs to you...without looking at your name!
Since editing is one of the most important elements of posting amazing Instagram photos, we are going to share a few power tips that will take your hair posts from good to great!
1. Image Cropping
Instagram has a standard square image size with every single post, so keep in mind that if you shoot in portrait or landscape, your image will have to be cropped to match the 1x1 image size. There are a few different ways to go about sizing your image outside of the Instagram app.
- You can choose to shoot in a square photo format on your phone, where it automatically sizes the image for you.
- The other option is to shoot wider than the square and go in after the fact and crop in. The benefit to shooting wider is that it leaves you with cropping options after the fact and allows you to create multiple images from just one photo. If this is the route you do choose to take, we use the app called AVIARY. Not only does it allow for crisp image cropping but you also can edit the image as well.
HOT TIP: Rule of Thirds! You know those handy grids on your photo during the cropping process? The point with these grids is to pick where you want to draw the attention of the eye. Where the grid crosses each other is going to be your strongest points of the images, meaning, that is right where the eye will go when it first sees the image. Your focus point needs to be what you want to showcase the most……yes the hair, because we are showcasing our work right?
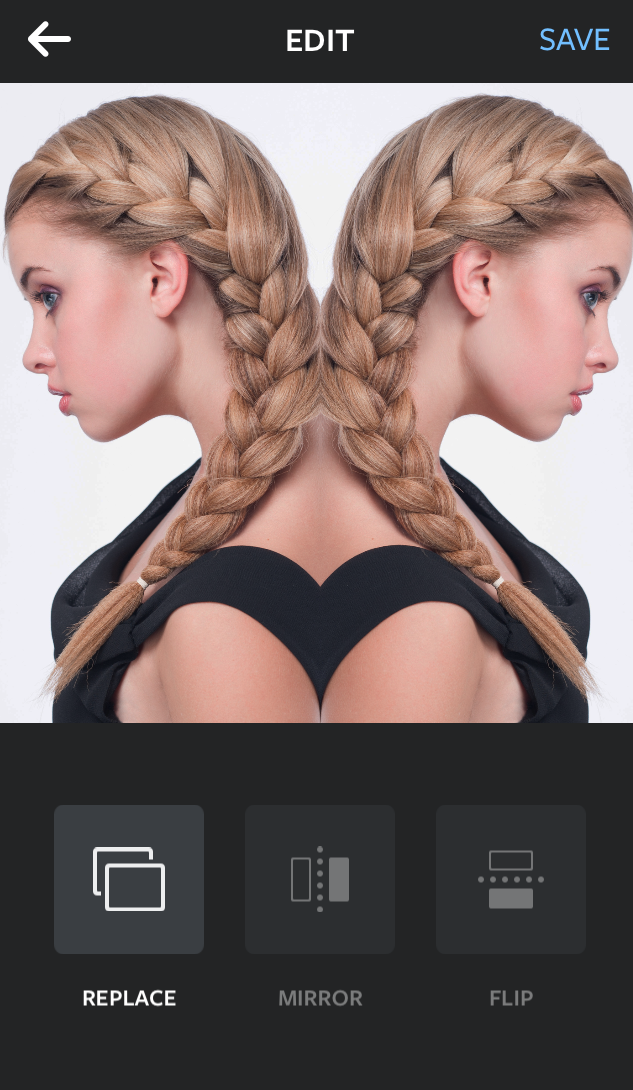
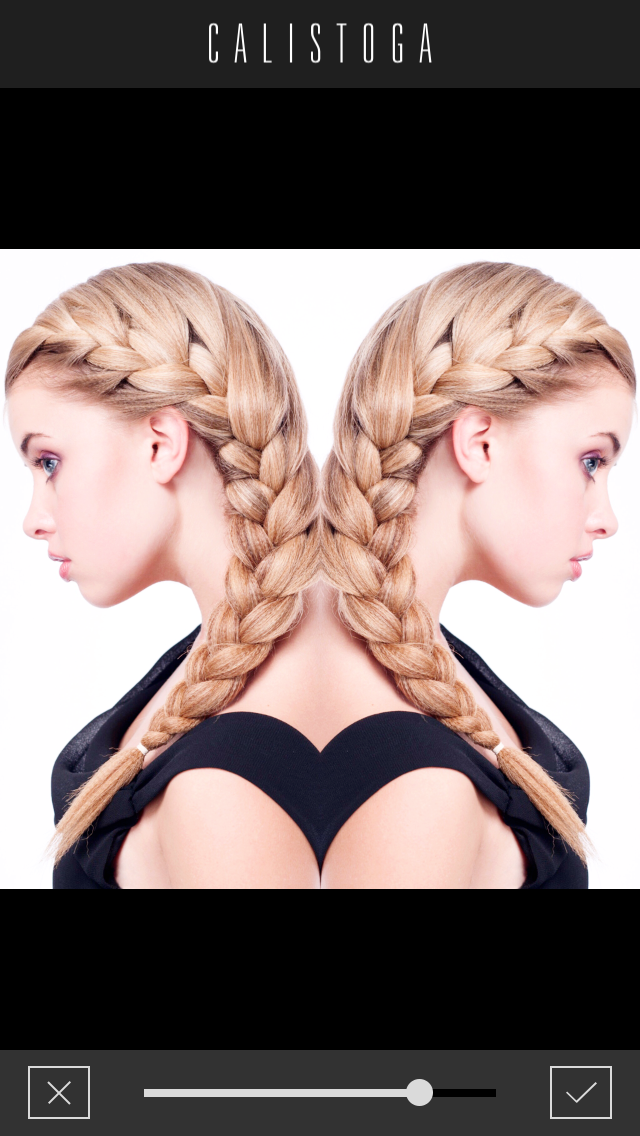
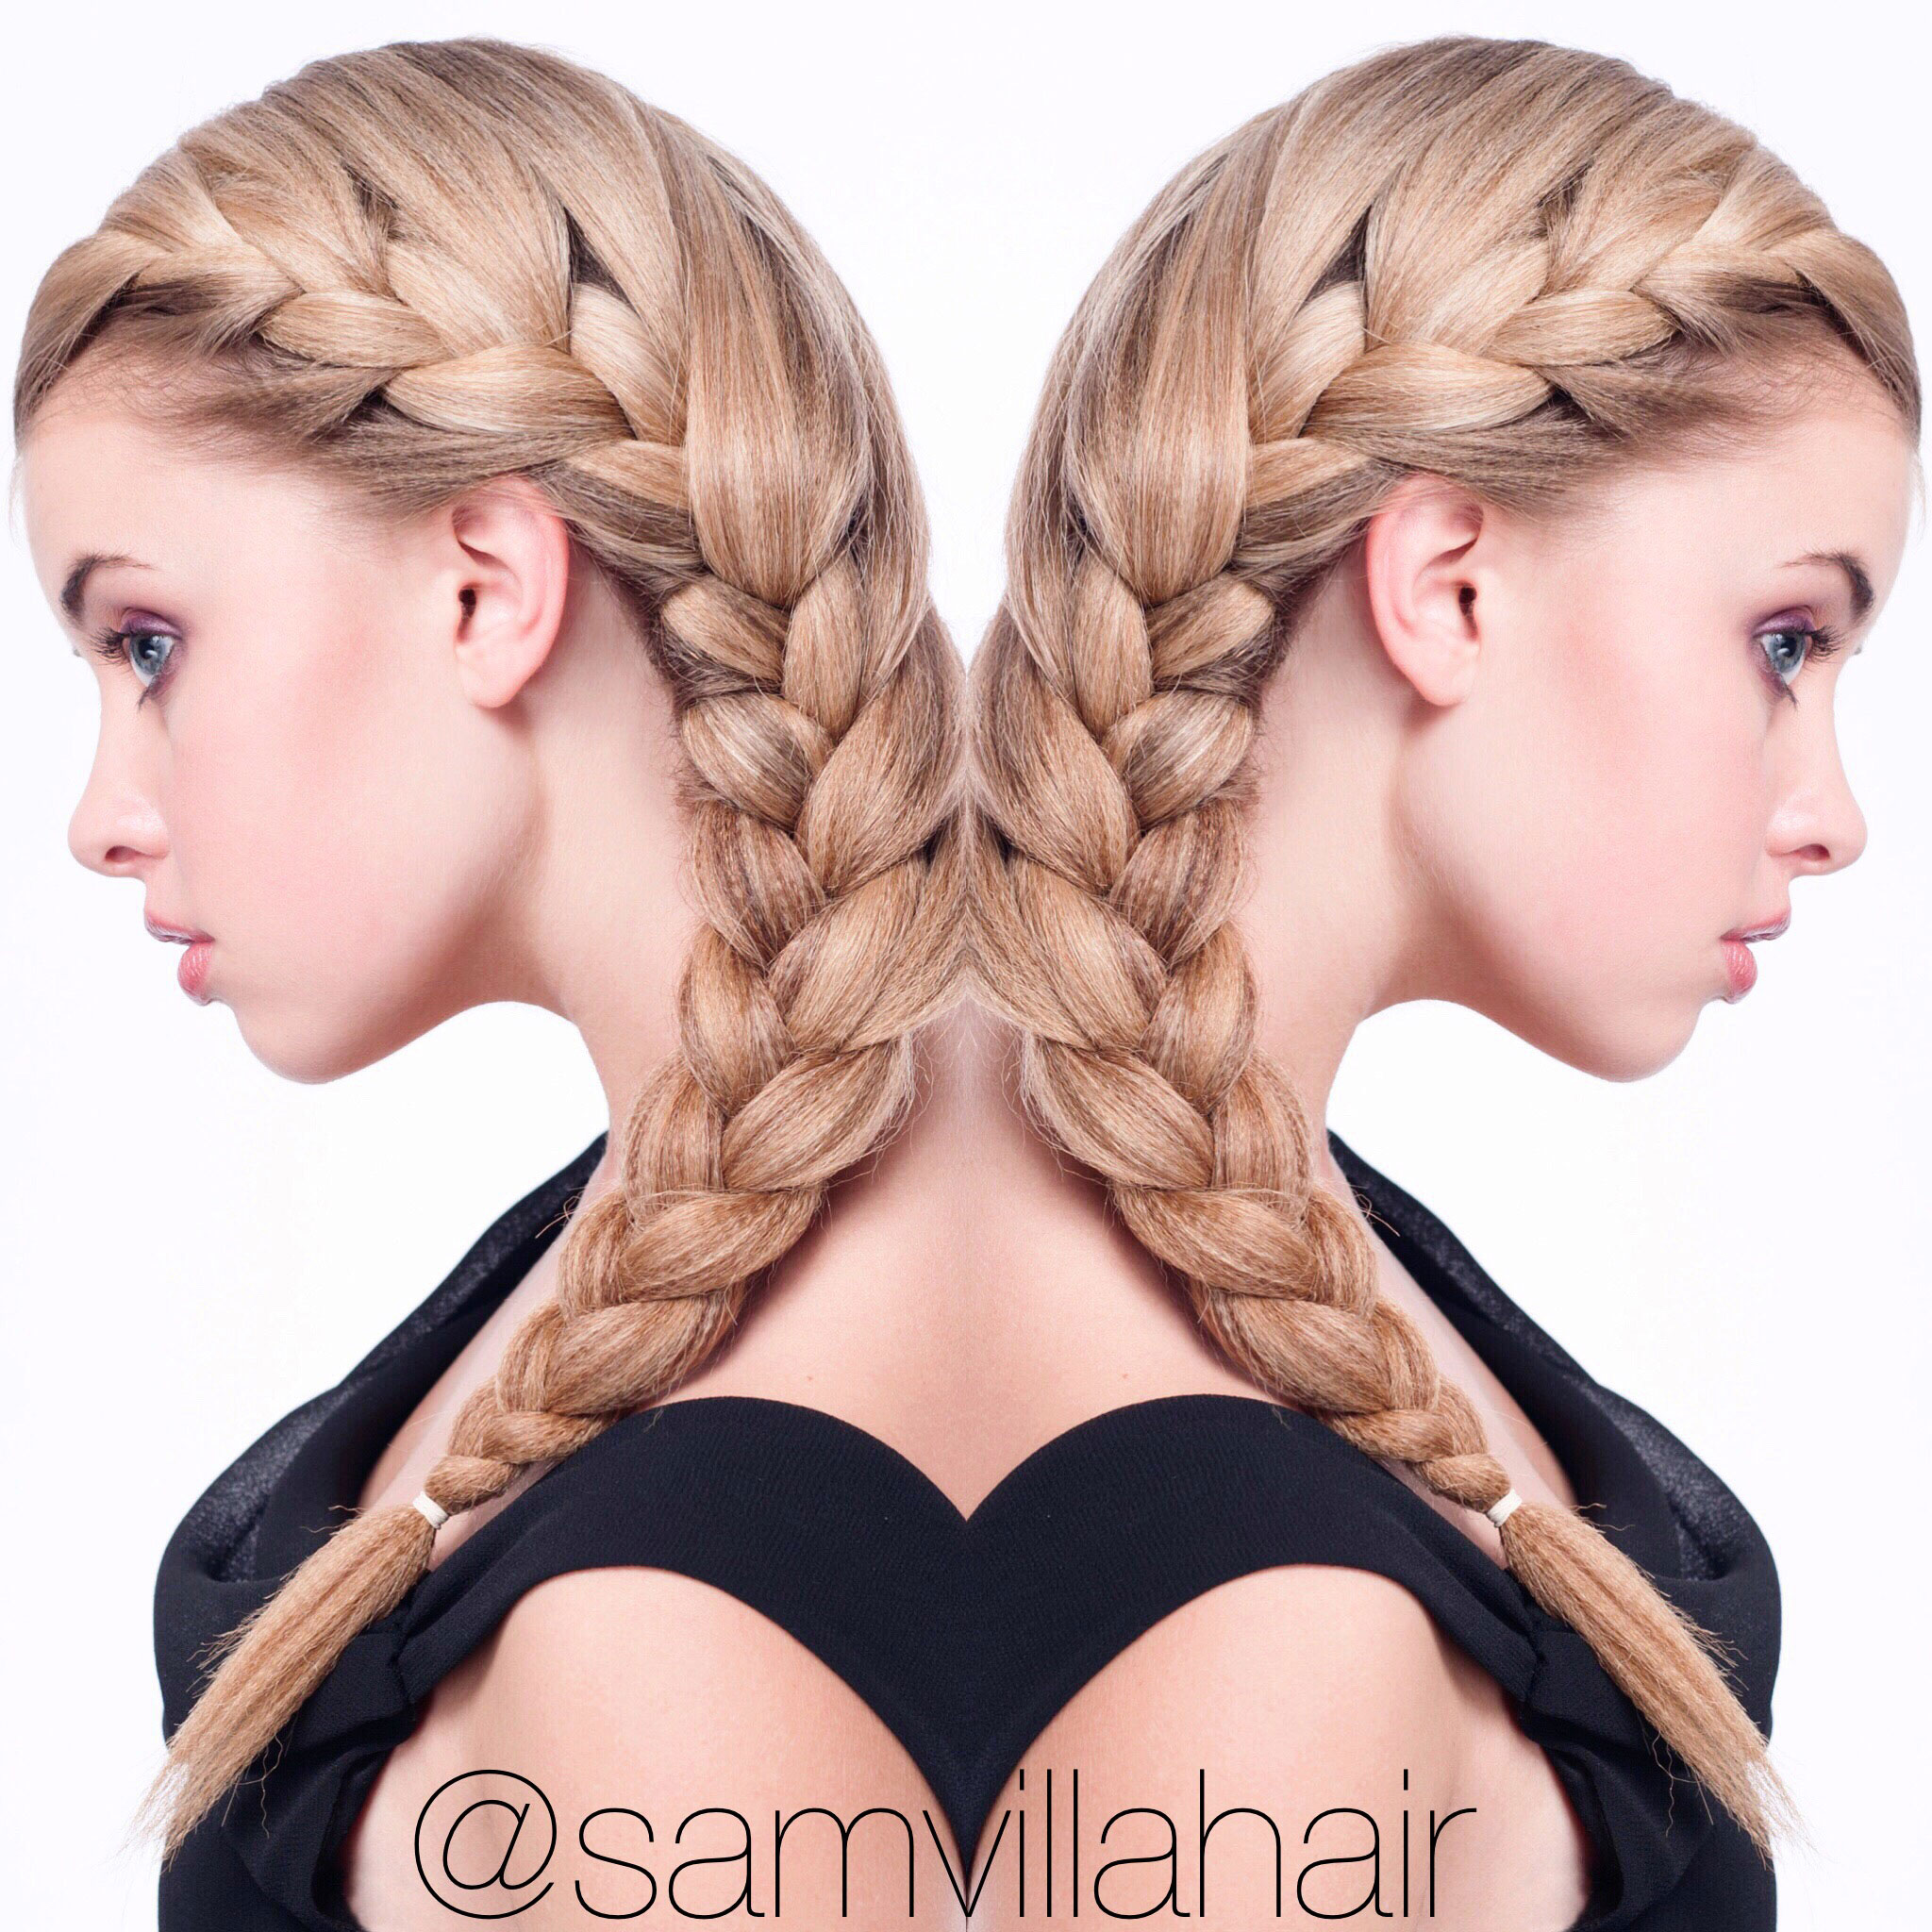
Use LAYOUT to Create Collages or the Mirror Effect: Created by Instagram, LAYOUT automatically places your images in a square format and then you have the option to create a fun collage or even the popular mirror effect to your images.
- Create a collage with multiple angles of your work but don’t overwhelm your viewers and refrain from creating collages with more than 4 images. A great idea is to use maybe 2-3 images and then save the other photos for reposting a few weeks later! It leaves you with more to show.
- LAYOUT also offers the mirror option. This option has become very popular and looks great with braids and updos.
- Simply select your own image, chose the side by side layout, then at the bottom hit the mirror button. You then can adjust the placement of the images and save!
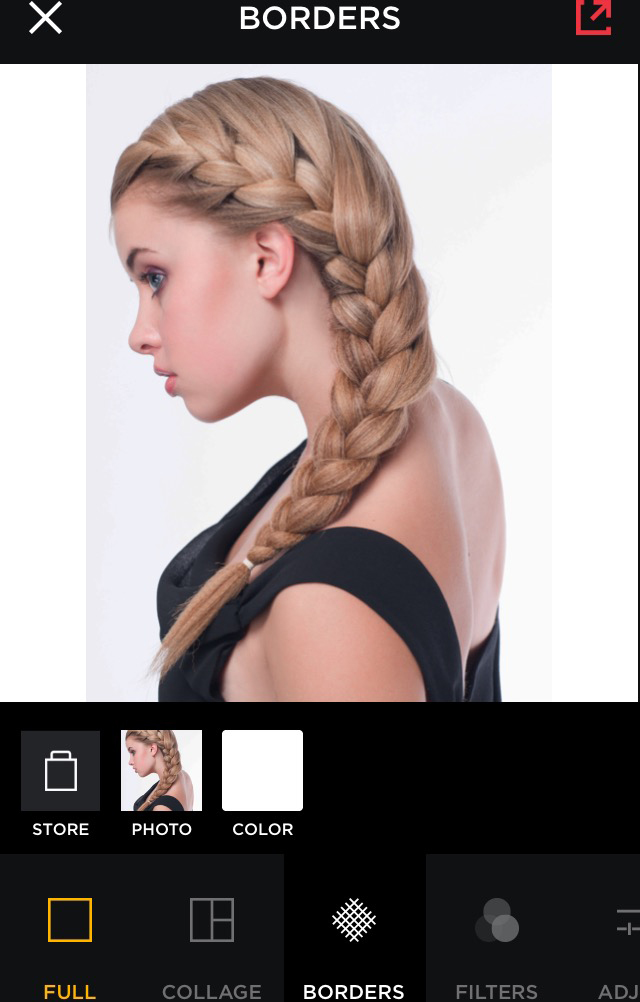
Instasize: This free app is great for when you have a photo that you want to keep in its original format (not the 1x1 standard size). Instasize lets you insert any size of the image within the square so you won’t lose any image. You can choose a border color to coordinate with your images – we suggest a clean black or white border with your images.
2. Image Clean Up
Now that we have our image cropped and the eye drawn to exactly what we want, let's start the cleanup process. We can’t always control our lighting, but with photo editing applications available on our devices we are capable of editing as if the image was dropped into photoshop. A couple of things to keep in mind during the cleanup process are: choose your style – do you like subtle and mute colors, deep and rich or maybe just clean and sharp? Once you have your style picked out, not only will this help to keep your Instagram feed consistent but it will also help brand yourself! Less is more; don’t overkill on the editing. Viewers tend to engage more with a photo that looks realistic and professional. Ok now that we’ve got the key points covered, let's take you into the cleanup process. We recommend two different photo editing applications, AVIARY and FADED. Open up the AVIARY app and that's where we will begin a mild image clean up.
- Sharpness: Again, less is more. Sliding the slider to the right, add a mild sharpness to the image. Don’t overkill it here.
- Contrast: Adding depth, clarity and natural color into your image, slide the slider to the right until you are happy with the amount.
- Brightness: Take note, on editing applications, exposure and brightness are two different lighting tools. For a more natural and all over brightening to the image, use the brightness slider. Be sure to brighten your images enough so your viewers can really see the detail of the hair, especially when working with darker hair.
- Shadows & Highlights: These sliders are especially useful when editing images of hair. Simply adjust the shadows and the highlights so the hair pops. Play with the slider either right or left so it enhances the detail of the hair.
- Now, lets hit the done button and open up the next editing application called FADED. Why are we using two different application? Glad you asked! Not all apps carry the same filters and you will find you will like some of the tools available in one and not the other, so It can definitely be a preference on which app you will use more.

Filters
The first icon on the bottom is the filter options. This app has a wide variety of filters to use and can accommodate most styles. Select the filter you want to apply, and adjust the opacity dial at the bottom to your liking. Keep in mind that we want to accent the hair and keep the image professional looking. Hit the check mark to save.
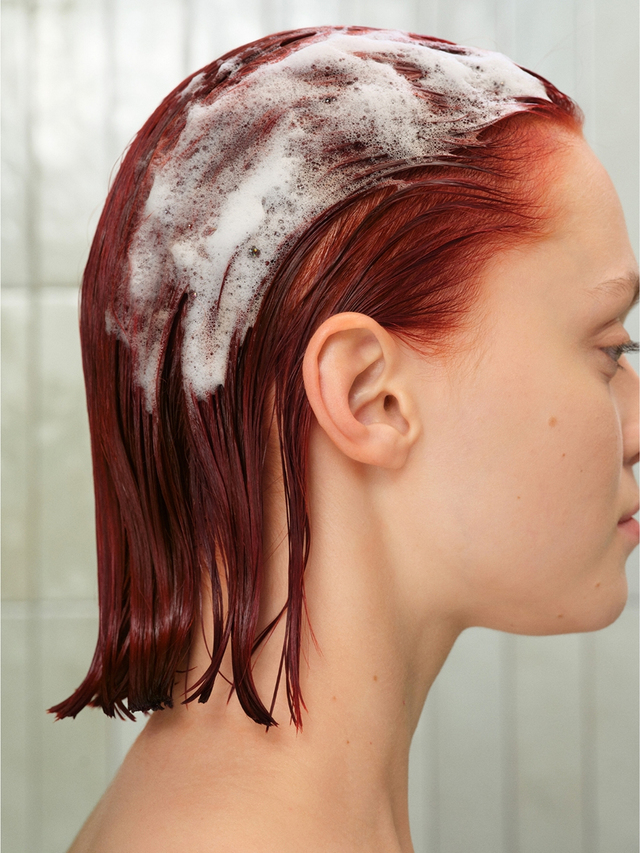
Within the FADED app, you have the options to add color overlays as well. When you have an image that is pulling strong red castings, try adding a blue color overlay and adjusting the opacity to a low number and this will balance out your colors.
Now you have a clean cropped and edited image!
HOT TIP: We suggest using a watermark on your images. This will help to brand yourself and it also helps to prevent someone else from taking your photo, reposting it and not giving you credit! We suggest using the app called IWATERMARK. This lets you upload your actual watermark and quickly place on images!
Show the hair world your talent and start sharing! We hope this helps you to understand the importance of the images but also creating excitement to really brand yourself!
For FREE education, special promotions and weekly inspiration and online workshops, be sure to sign up HERE!
Looking for even more hair care and styling tricks, be sure to stalk Sam Villa Professional on Bangstyle and check out all of his tools in the Bangstyle Store!