So, hear me out … I had heard of Dip Powder nails but convinced myself this was a professional service. Not that anyone had told me that - I think I made it up due to the nature of the product. When I came across a Revel Nail demo I realized that they could be done at home!
Dip Powders might seem more intimidating than any lacquer, long-wear or even gel set. It also requires a slightly higher financial commitment due to the number of products needing to be purchased but I would strongly suggest not letting those detour you from giving it a go.
A couple of the more notable dipping brands include Revel Nail and Kiara Sky Nails - both of which make dip system starter sets.
This video shows the relatively standard process for a Dip Powder Manicure. There are quite a few steps with quite a few different polishes.
I got my hands on the Revel Nail starter kit and couldn’t wait to get to dipping. Full discloser: I didn’t try this out on myself as I was rocking a pretty sweet set of new gels. I enlisted my sister and one of her nails (literally - one nail).
Included in the Revel Nail Dip Powder Box Kit:
- 4 (1 oz.) jars of Dip Powder
- Pro Base
- Activator
- Finish Gel
- Brush Softener
Benefits of using Dip Powder (According to Revel Nail):
- Healthier nails with vitamin E & calcium
- No UV light needed
- Easy removal & fast application
- Mirror finish that lasts over 4 weeks
- Odor-free
- Strong & durable
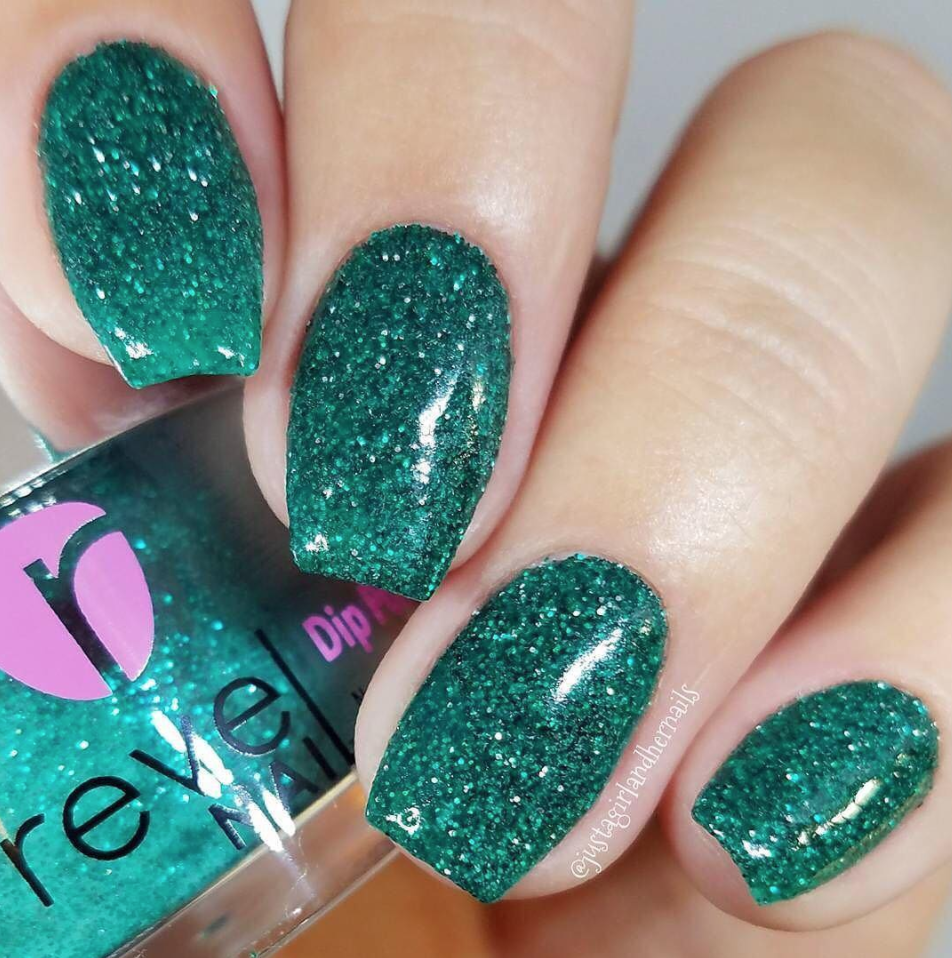
Starting with a lightly buffed, unpolished, bare nail we applied one coat of the Pro Base. Then, we dipped the finger into the powder of our choice (we went with “Harmony”). Following the dip and a light flick of the finger (I learned this while watching a demo and figured if the pros were doing it, there must be something to this technique?), I reapplied the Pro Base and dipped (and flicked) the finger again. Then I applied a coat of Activator to the nail. After the Activator, I lightly filed around the edge of the nail and brushed off excess powder. This was followed by another coat of Activator. Think we’re done? Not yet. Finish your manicure with 2 coats of Finish Gel.
Yes, this is a lengthy process but would have gone by a lot faster if I was familiar with it. It’s not too far off from the standard base coat, 2 lacquer coats and a top coat. Plus, the “dry time” that occurs with regular polish is not a factor.
I’ll be honest - I was 100% impressed. My sister’s nail felt stronger - somewhere between regular gels and hard gels - and the color was really pretty! It was the perfect every day neutral. I could totally see this manicure lasting solidly for a couple of weeks.
The removal process is similar to gels; you have to break the top coat seal and soak each nail with 100% acetone for a solid 7 - 10 minutes. Be patient.
If you are up for spending a little more time during the application and removal process for a result that is beautiful and long-lasting - we definitely suggest looking into a Dip Powder system!
Looking for more nail inspo? Keep scrolling or check these out!