With 94% of women looking for solid styling advice, we’ve found that only 32% of them actually receive it. And, with a whopping 75% that are willing to pay for styling services, this leaves a huge market up for grabs in the salon. While we’ve noticed more and more stylists advising on upselling waves, we think that you can mark up more than just that. Think about adding the following signature styles to your services to create an easy to choose a menu of services at your station!
Keune’s latest launch – Style – is a beautiful collection of 30 products including 9 new ones that can be used to construct the following 6 looks.
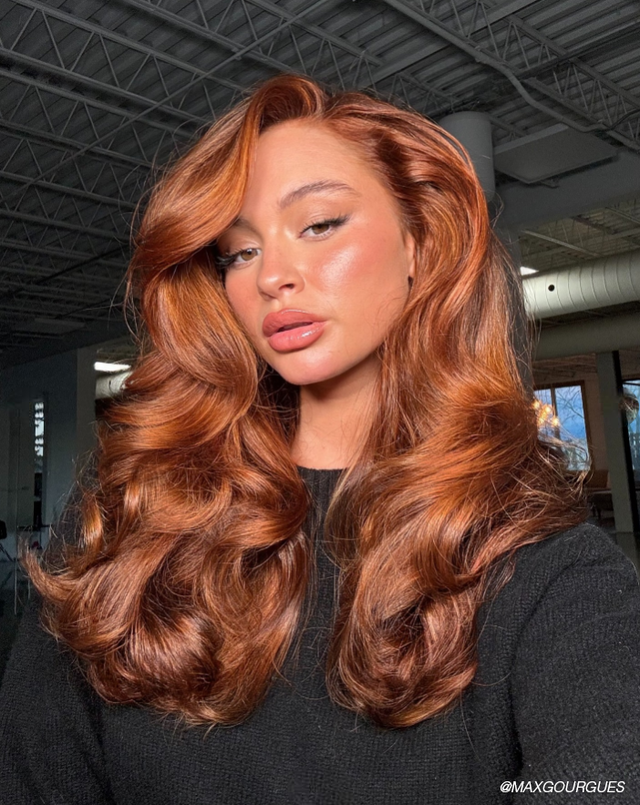
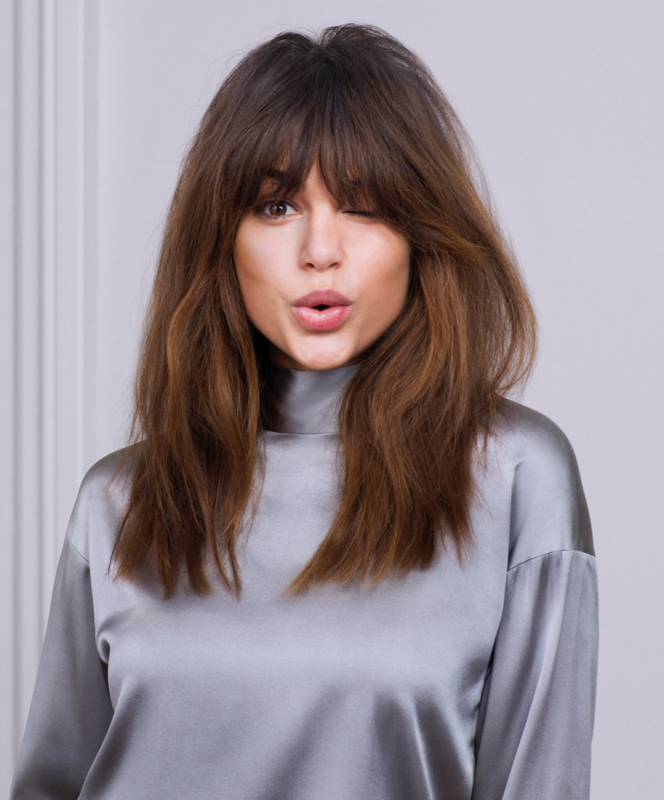
The Bombshell Blowout
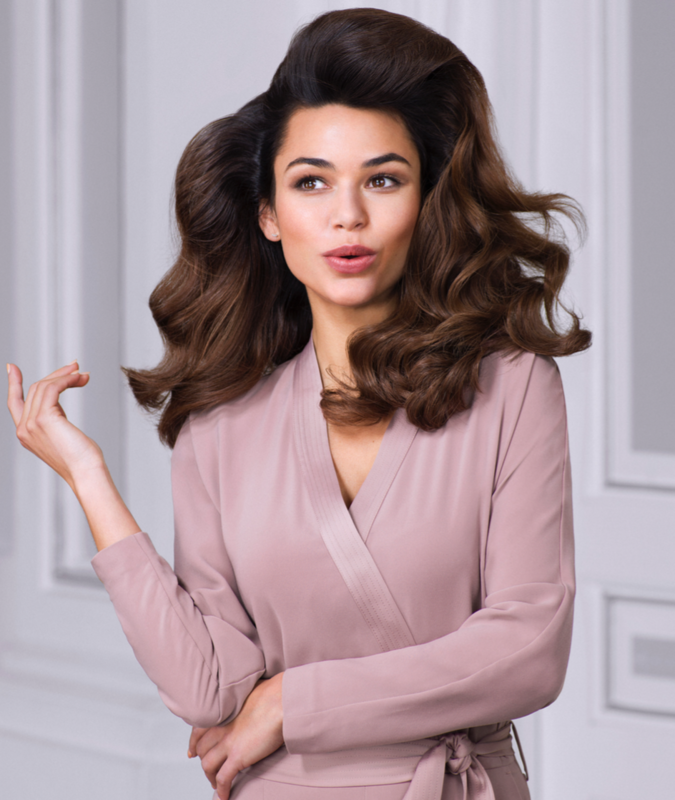
Great for clients of all lengths who are looking for a new way to add body and movement to their style! This look is sure to inspire confidence for any woman and show off her hair color in a lush new look!
Step-by-step
Step 1: Make a section in front. Match the size of the section with the size of your round brush.
Step 2: Apply a generous amount of Soft Mousse to this section.
Step 3: Set your blow-dryer to medium heat. Starting at the roots, place your brush on the back of the section. While maintaining tension, pull the brush towards you.
Step 4: Place your brush on the roots in front. Repeat step 3.
Step 5: Place your brush on the back of the section. Carefully slide up, without tension. Roll your brush up and down to shape your style. Make sure the airflow is skimming the surface of the hair.
Step 6: As soon as it’s dry, let the hair cool off.
Step 7: Slowly remove the hair from the brush and roll the hair around your fingers.
Step 8: Clip the hair tight with two no bend cushion clips, one on each side.
Step 9: Continue these steps in a brick-laying technique towards the nape.
Step 10: When all the hair is clipped back, let it cool.
Step 11: When the hair is completely cool, take out the clips, starting at the nape. Brush the hair with your oval cushion brush and shape with your hands. Finish with Spray Wax.
The Wonderful Wave
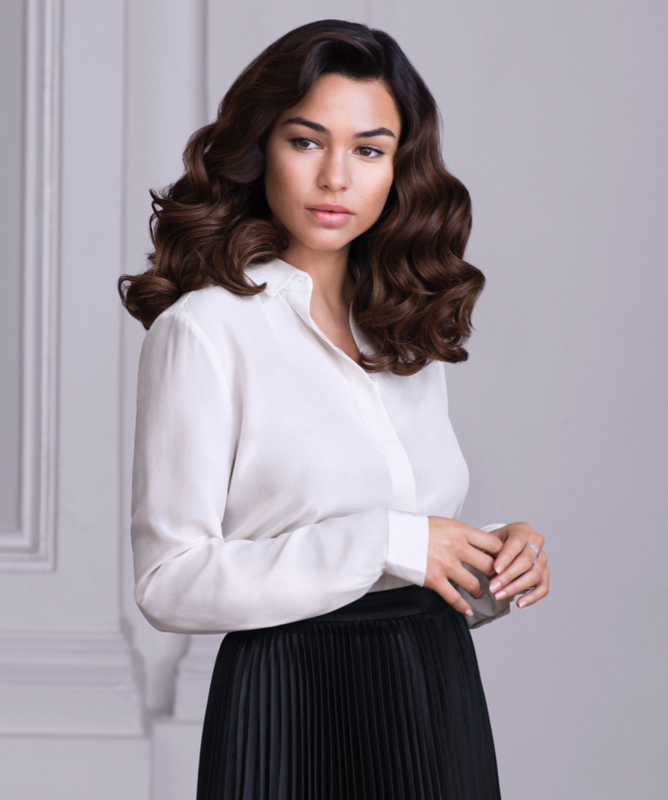
A perfectly polished style that can be worn day and night – this smooth and silky style gives us all a reason to fall in love with waves, all over again! We love this look on mid-length styles but can be rocked on all lengths!
Step-by-step
Step 1: Before starting, work Soft Mousse through dry hair, section by section. Blow-dry with your oval cushion brush, starting at the top side of the section.
Step 2: Pull each section straight to your chest and place the brush underneath the hair to smooth and polish.
Step 3: Make a side parting and a vertical section just behind the ears to separate the front part of the hair.
Step 4: Start at the nape with a horizontal section. Spray this section with Soft Set Spray, from roots to ends.
Step 5: Horizontally twist the hair around an open curling iron.
Step 6: Close the curling iron at the end and then turn it toward the roots.
Step 7: When the hair starts feeling hot, slide the hair off the curling iron. Clip the roll tight with a pin curl clip.
Step 8: Work your way up the sides using a brick-laying technique. As you reach the top of the deep side, increase the amount of hair left out at the base. This will reduce the volume on top.
Step 9: Remove the pin curl clips and brush the hair with an oval cushion brush.
Step 10: Backcomb the hair from underneath in three sections: two at the sides and one in the back. Work the wave in the hair with your hands and/or using a tail comb. Contour the front by placing some no bend cushion clips to set the hair. Finish the look with High Impact Spray.
The Romantic Retro
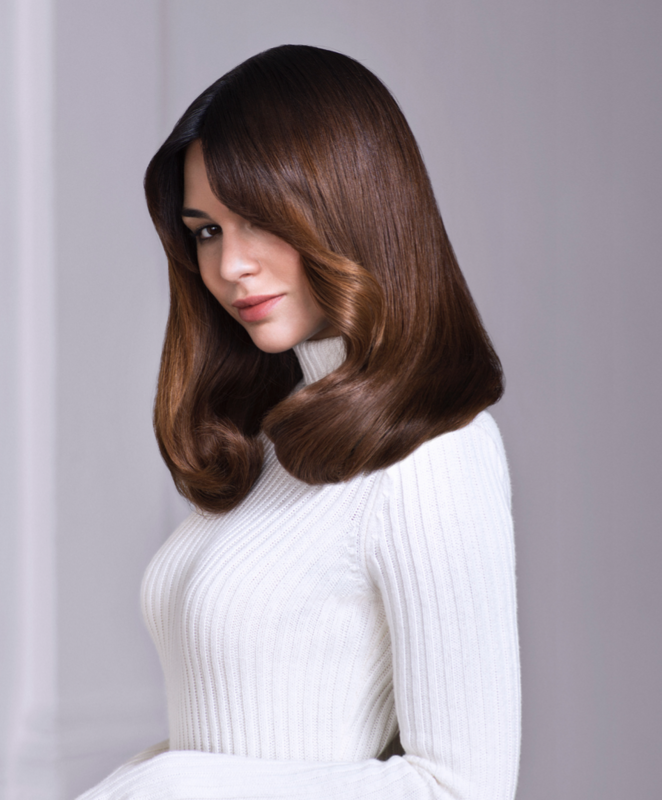
A new way to wear your go-to blowout – update your usual straight look with a slight bend and a whole lot of style! This is sure to show off a shiny new color or perfectly placed curtain bangs with ease!
Step-by-step
Step 1: Work Soft Mousse through dry hair.
Step 2: Blow-dry, using your hands and oval cushion brush to lift the roots.
Step 3: Create a small triangle section at the front of the head, by making a center part that extends to the apex of the head and down to the recession.
Step 4: Twist the hair around a big curling iron from roots to ends. Pin into place with a pin curl clip.
Step 5: Continue curling the hair working from the top towards the nape. Repeat on the opposite side.
Step 6: Once the curls have cooled, remove the clips and brush the hair.
Step 7: Finish the look with Freestyle Spray.
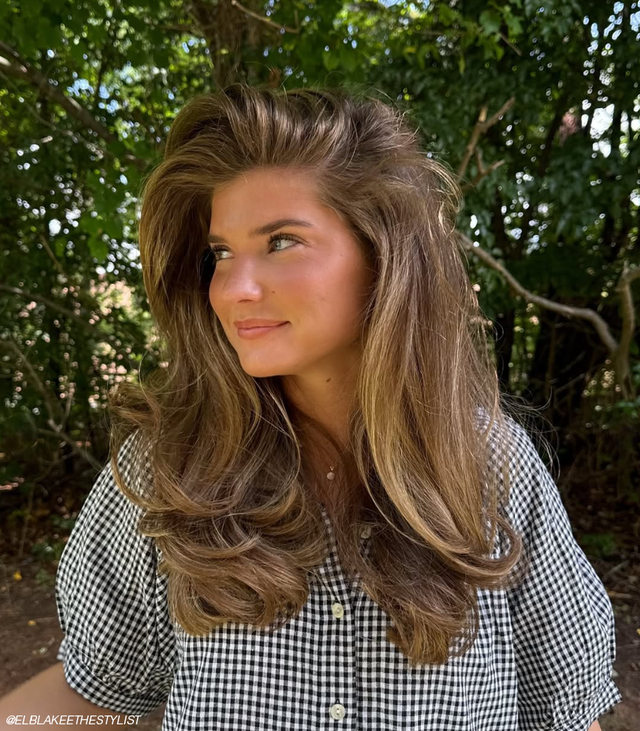
The Tousled Texture
The ultimate undone finish, we have a feeling this style will be a fan favorite this season. The great part about this blowout is that you can use a cushion brush for a large amount of the styling, cutting down on fatigue. This is a great option to teach your clients if they’re looking for a go-to look that doesn’t take a lot of effort.
Step-by-step
Step 1: Work Soft Mousse through dry hair, section by section. Blow-dry with an oval cushion brush starting at the nape.
Step 2: Make a center part and start curling from the top sides to the back.
Step 3: Twist small sections around a medium-sized curling iron, leaving the ends out. Continue on the other side.
Step 4: Shake the hair loose and spray with Dry Texturizer. Scrunch with your hands for a soft, grungy effect.
The Ultimate Updo

This retro updo goes hand in hand with all the styles we’re seeing sauntering down the runway. A classic shape that looks fabulous on any face shape, it can be tailored based on your clients needs.
Step-by-step
Step 1: Clip away a small horseshoe section on the top of the head that extends from the crown to high recession on both sides.
Step 2: Using Spray Wax for control, comb the remaining hair towards the back of the head.
Step 3: Twist the hair around your hand.
Step 4: Take the twisted hair into your other hand. Roll without tucking in all the ends.
Step 5: Vertically secure your roll with a bobby pin. Make sure it’s tight!
Step 6: Use U-pins to perfect your roll by inserting them in the direction of the roll, then flipping them and pushing them in towards you to secure.
Step 7: Using a Denman brush, create volume at the base of the horseshoe shape.
Step 8: Shape as desired! Take your client’s face shape and preferences into consideration when designing the front section.
Step 9: Secure with bobby pins.
Step 10: At the front, pull and pinch into place. Continue to fine-tune your look, as you use Liquid Hairspray and your blow-dryer to set hair into place.
The Polished Ponytail
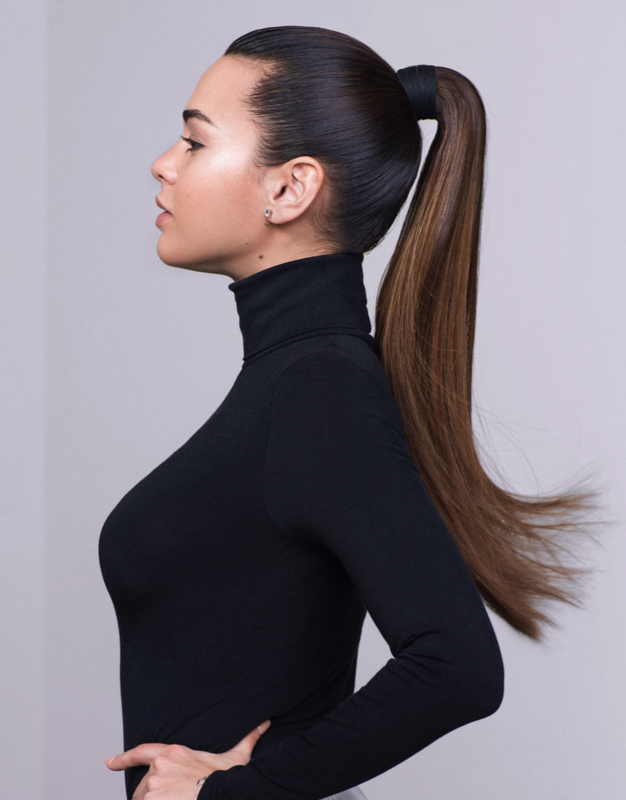
Who doesn’t love a dramatic ponytail? This look is best suited for mid to long locks and is the perfect answer to second-day strands. This is an easy add on for clients visiting for a bang trim or a quick gloss and go!
Step-by-step
Step 1: Brush the hair from front to back, gathering the hair in your hand as you go.
Step 2: Sweep the hair up with each brushstroke until it’s where you want your ponytail to be.
Step 3: When the top section is tight and smooth, let your colleague put their flat hand on it. Brush the bottom, starting at the nape, to smooth and tighten the lower half.
Step 4: Make sure the top section is still smooth and tight.
Step 5: Hold the ponytail in one hand without too much tension.
Step 6: Have your colleague wrap an elastic around the hair.
Step 7: Tie it once and hold it like so.
Step 8: Using a tail comb and your hand, perfect the hair.
Step 9: Texture can be added to the ponytail for more contrast against the smooth front. Finish your ponytail with Spray Wax.
Keune, for the salon professional since 1922.
To learn even more about their brilliant color, stunning styling, and trend inspiration be sure to stalk Keune on Bangstyle and follow them on Instagram, Facebook, Twitter, and Pinterest!
Looking to expand your education behind the chair - take a peek at all the classes Keune is offering this year at http://keuneeducation.com/programs/!