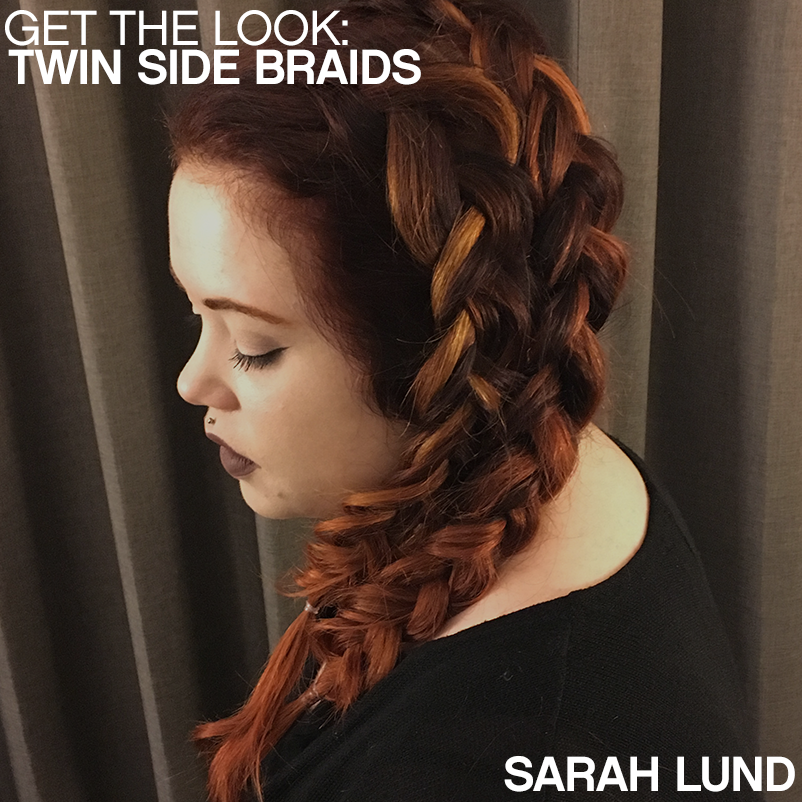
If you're looking for a fun twist on a new braid style, check out this twin side braid! Created by KEVIN.MURPHY STYLE.MASTER Sarah Lund, this braid is the perfect pick-me-up for the winter weather! Follow along below to get the look!
What you will need:
Elastic Bands
Long U-Pins

As a first step you want to prep the hair with DOO.OVER to give a light control, this will make the hair easier to braid.
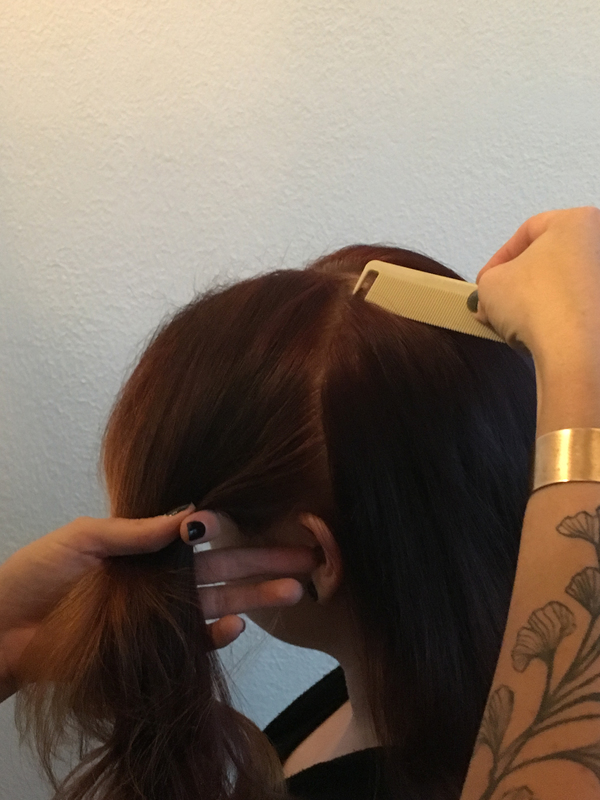
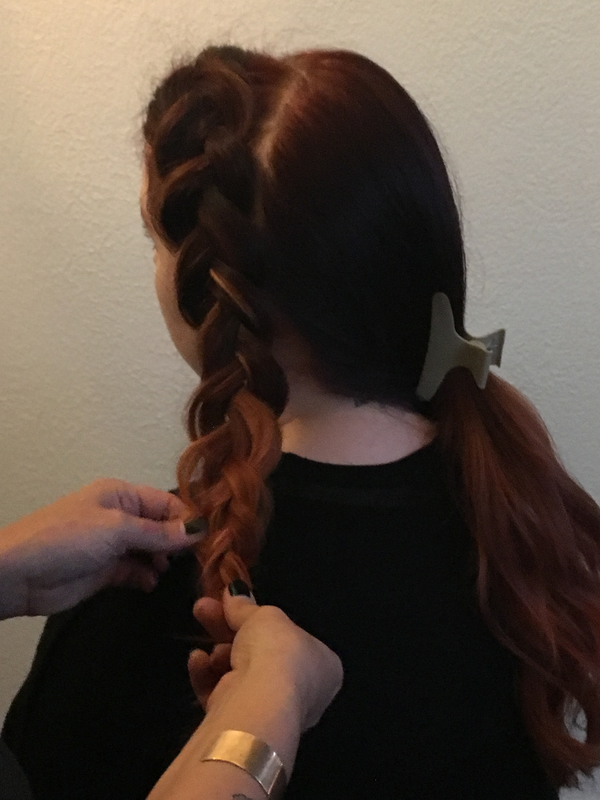
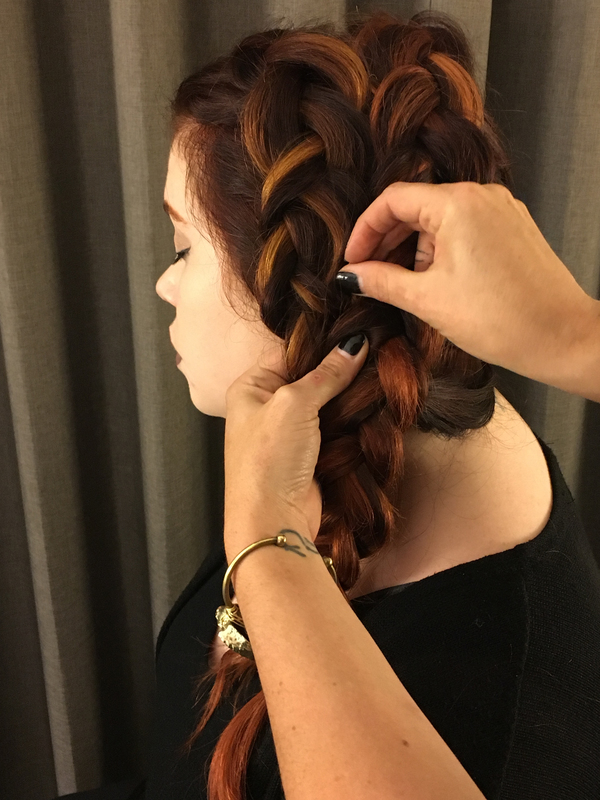
You want to start with the braid closest to the face by sectioning from the top of the crown to just behind the ear, clip the remaining hair away. Begin by Dutch Braiding the hair, keeping the braid loose and close to the back part line. Braid all the way to the ends and pull braid out before tying off with an elastic.
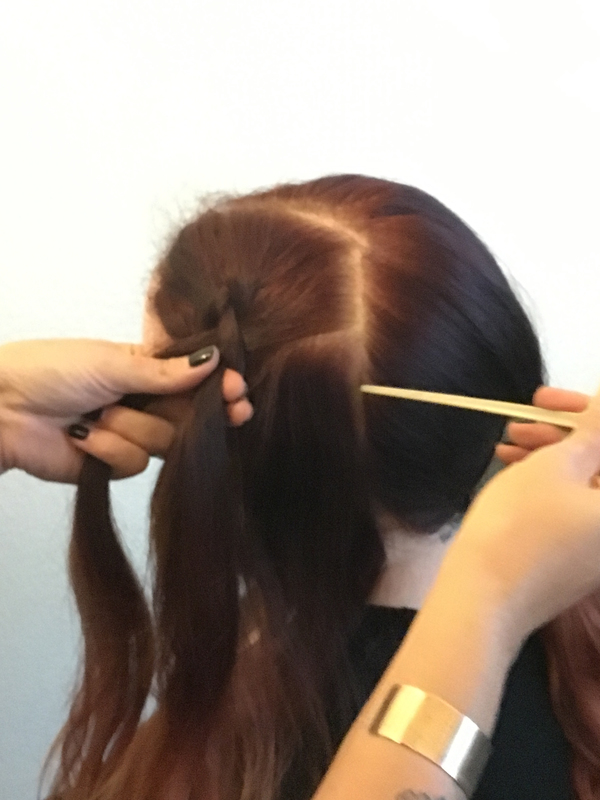
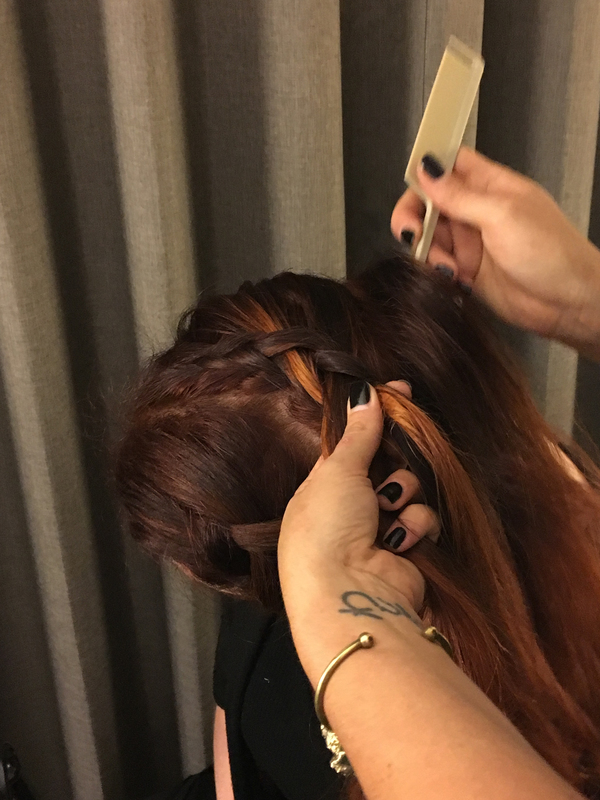
For the second braid, have your client tilt her head drastically to the side to give you better control when braiding the hair. Start the second braid right next to where you began the first making sure to keep them as close together as you can. Use a tail comb to grab sections from the opposite hairline and pulling around the head with a Dutch Braid technique. Once completed pull braid apart with hands to fatten and tie off with an elastic.
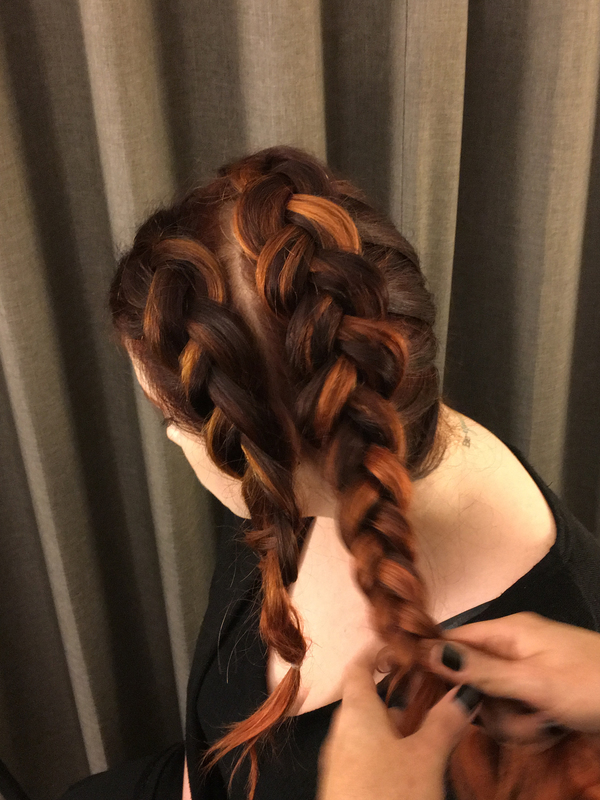
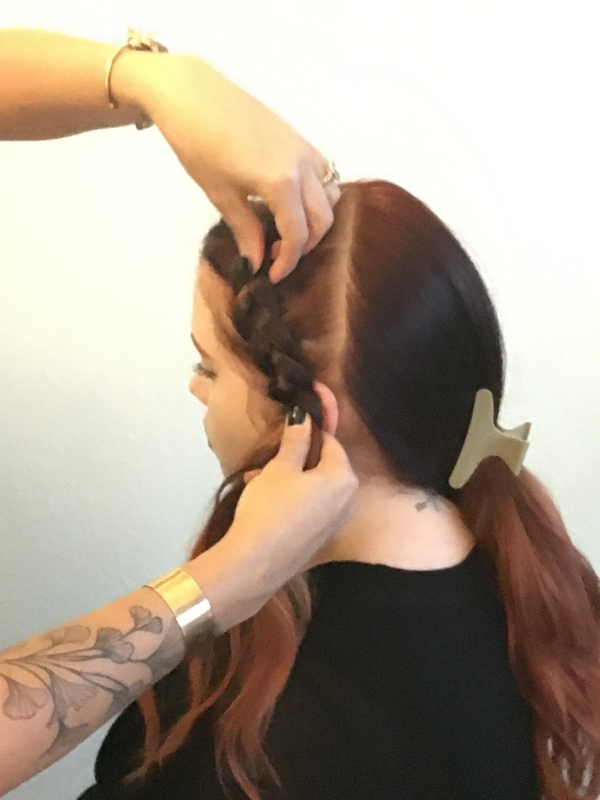
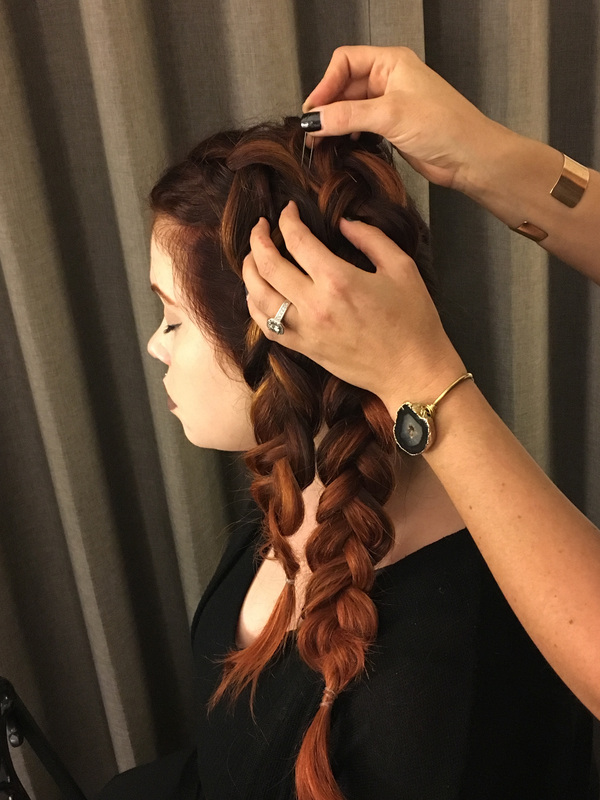
Bring the two braids together by securing with long U-Pins. Finish with DOO.OVER for extra hold and texture!
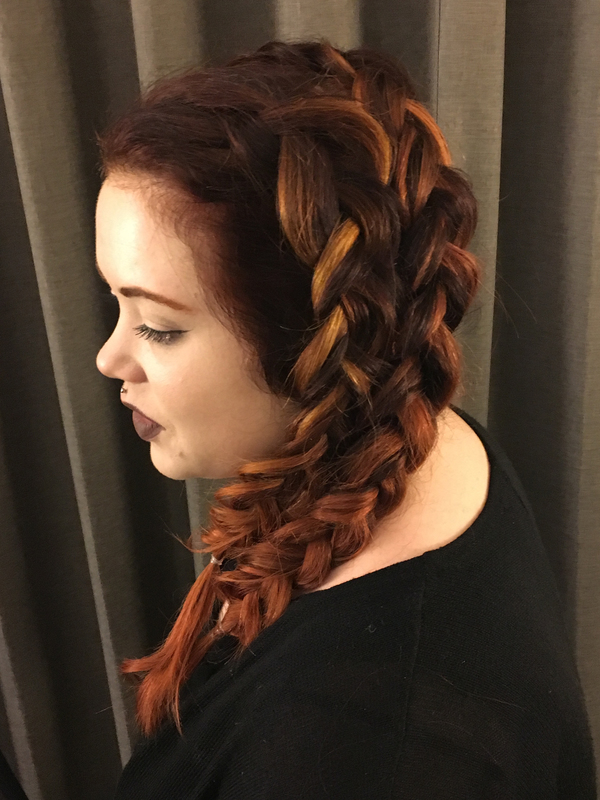
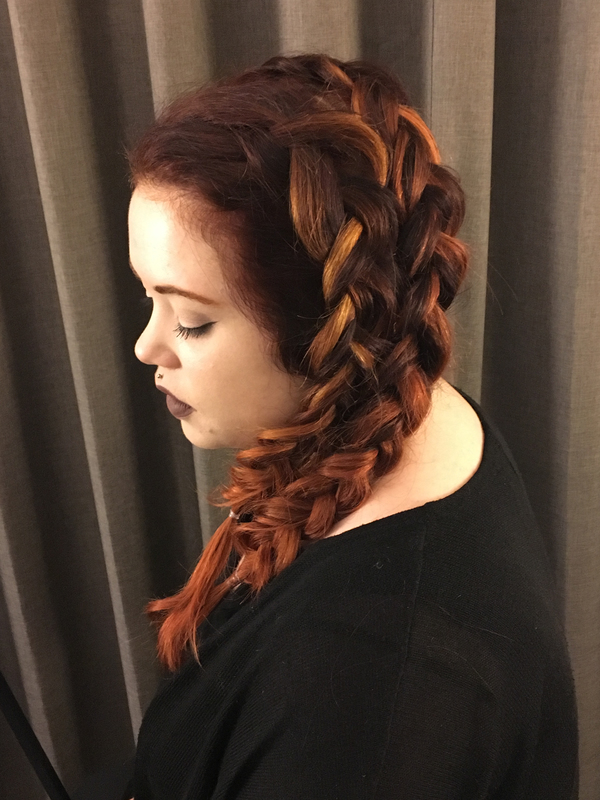
The Finished Look:
For even more hair tips and tricks be sure to check out all of the tutorials, here!