I’m from a super small town (population 1600) and our biggest claim to fame so far is that the BBQ Pitmaster, Myron Mixon is our mayor. My mom is the town Library Manager and essentially raised a generation that I also went to high school with. Now they have kids of their own and every Wednesday we meet up to read, paint, and color—whatever floats our boat. What does this info have to do with a hair tutorial you ask? Well, three of these next-gen children are like my surrogate nieces and they are OBSESSED with all things Unicorn, Rainbow, and Mermaid. As someone who is super emotionally invested in them, I find myself in my Redken travels seeking out trinkets for these small humans.
So when I arrived in LA, I started scouting out new and rare My Little Pony dolls—you know with the long, colorful, tangle ridden hair?—and my concept for the Redken NBT photoshoot at Bangstyle with Rodney Cutler solidified. Obsessed with Game of Thrones, (I am a braiding fiend) I began to think what if the Mother of Dragons (Breaker of Chains, Khaleesi of the Great Grass Sea etc…) got hooked up with My Little Pony vivid color? Awesomesauce--That’s what.
So! Two paragraphs of exposition down, let’s get into how I did this THANG.
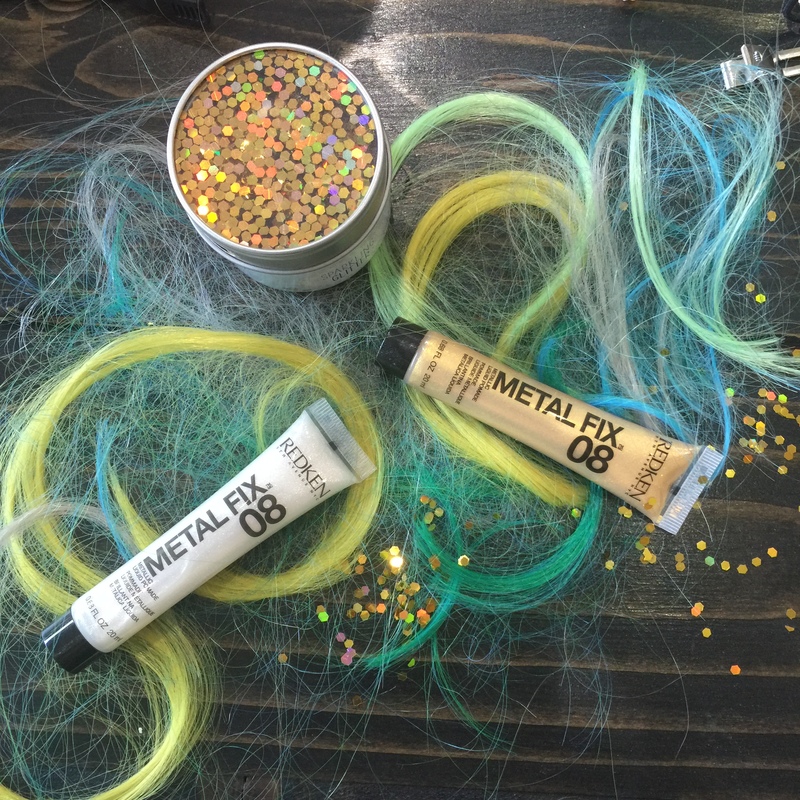
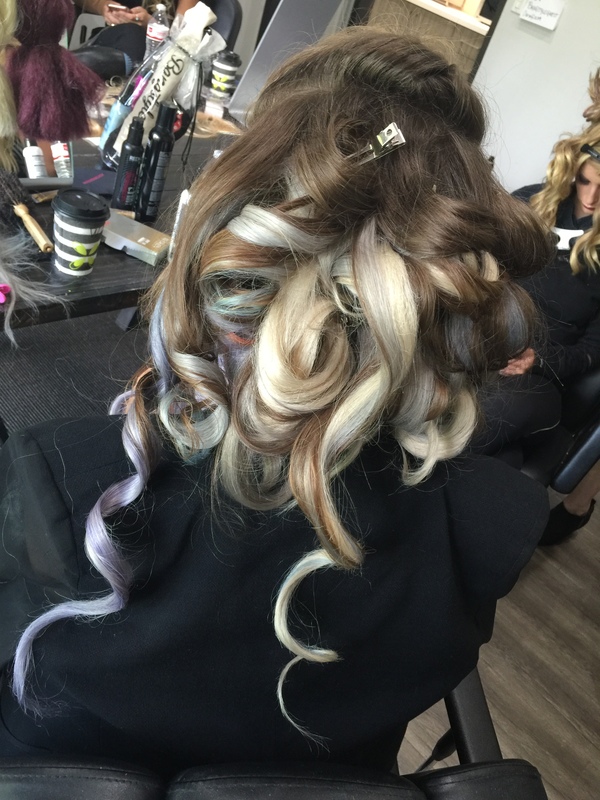
I started by sectioning off the top area above the parietal ridge and bang area so I could focus on the braid and then get into the face-framing later. This also ensured that I had enough hair left out at the crown to cover all the extensions that were going to be added. I started piling in 18-22” 100% human hair clip-in pieces. These extensions, I custom dyed using Redken City Beats and Shades EQ Gloss 09T with Crystal Clear equal parts. I wanted silvers, lavenders, yellows, and teals.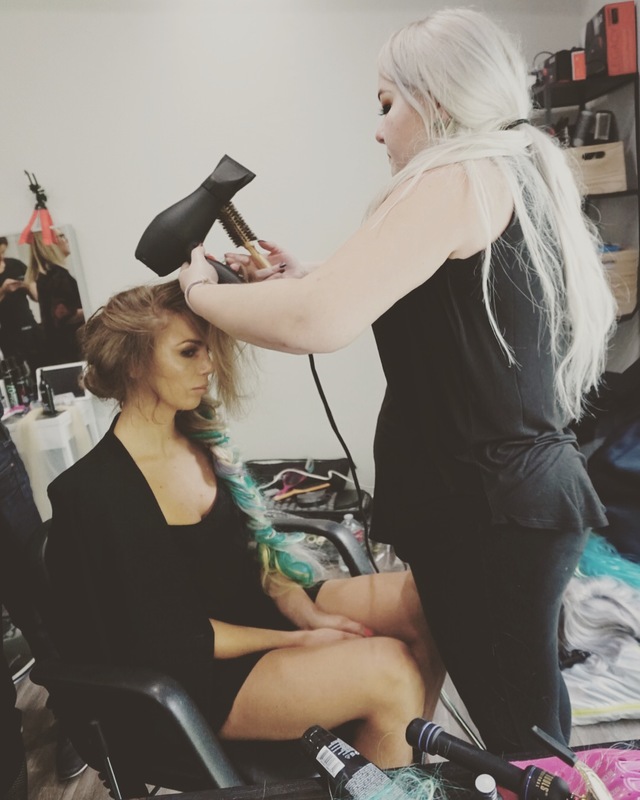
Once all the clip-ins were secured, I let down the hair above the parietal ridge and blended it with the extension hair—keeping the areas around the face pinned up for later. I started curling, integrating my model’s natural hair with the extensions using various types of curls and iron widths—the more random the better. Redken Iron Shape 11 was my go-to for this—medium hold and super heat protection! I let them set for 20 minutes (as my Model ran to makeup) and drank some coffee.
After the curls had set, I took them down and ran my fingers through them with a tad of Redken Braid Aid 03, so I had a little tack and I set to work on THE BRAID. I began behind the right ear and started a French Fishtail against the head—wrapping it around the nape all the way to the other side of the head under the left ear. I put an elastic in there and drank more coffee. The hair now appeared from the front as a side ponytail. Leaving the elastic in, I continued to fishtail the length two more inches—and then the fun began.
I had precut tiny 2-3mm width pieces of hair from extra extensions and wigs. At this point, the hair used can be synthetic because no more heat will be applied. I took these tiny pieces—the amount you would use in one crossover section of the fishtail and secured one end with a small rubber band and attached a bobby pin. I then atta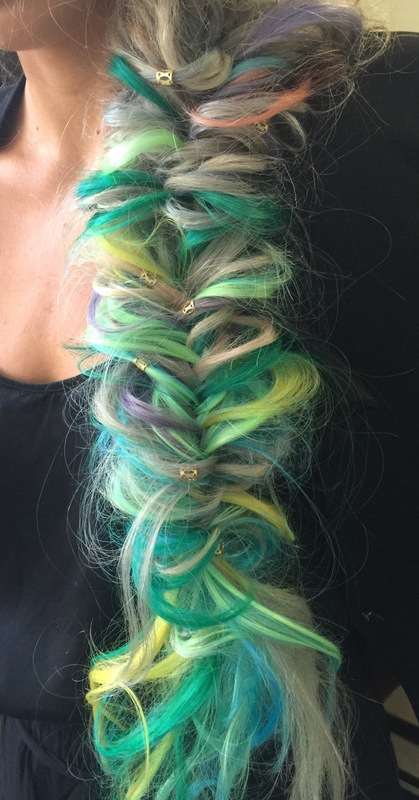 ched the piece using the bobby into the back of the braid right where you’re ready to continue braiding. You can repeat this process for as long as you want with as much hair as you want with any colors you want! This trick allows you to keep braiding in more length securely. It’s a perfect technique for parties or Halloween—you can just buy a cheap long hair cosplay wig, cut and secure small pieces, and braid away.
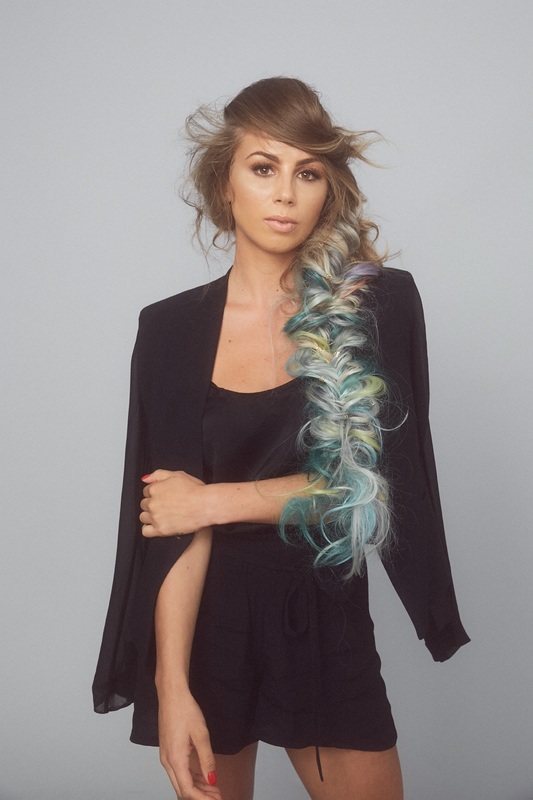
Once the braid is secured at the end with the desired length, you can use a sectioning comb to pull small pieces out. You can rouge the braid and tug on it until it is the width and shape you want. The fishtail is super secure and will withstand most of what comes at it. All that’s left now is the face-framing! This part is completely up to you but I chose to take Rodney’s advice and do a sweeping windswept bang.
We achieved the look by layering in Redken Guts 10 at the roots of her dry hair and doing a sleek direction blow dry 3-4 times layering Guts as we went. Guts is an amazing product for this as it incorporates into the hair while the hair is dry and leaves no sticky residue. It can be layered endlessly using this technique to get as much volume as desired. Once the blow dry was complete, I sprayed it with Redken Triple Take 32 Hairspray and created a wave-like shape—but remember your shape can be whatever you want! Once the blow dry volume is there, the bang area is completely malleable and can change to fit your style and face shape. Pin it with some French pins and that’s it!
Final touches: I added some gold rings into the braid to give it a warrior vibe and painted Redken Metal Fix 08 mixed with glitter sparingly throughout the braid to add texture and visual interest.
TAKEAWAYS!
Adding small sections from pre-dyed extension hair or wigs is the key to this look—it can be inexpensive and quick—you can use any color or length and this technique works with all sorts of hair lengths and textures! I hope you have fun with this one!
Go forth and be the Unicorn Warrior Mermaids you were meant to be! – Woodward Bartlett @makewoodwardup