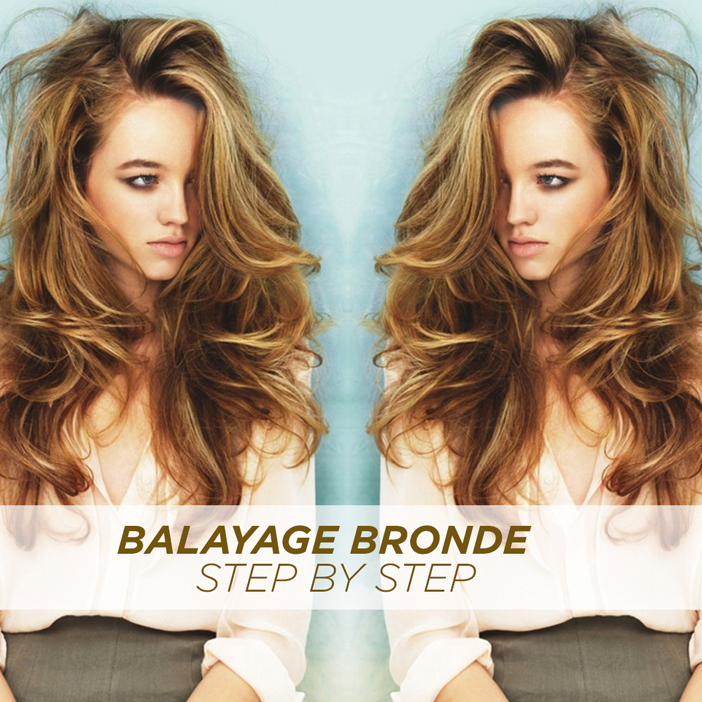
Step by Step written by, Colortrak Artistic & Technical Director, Gregory Alan.
Follow this simple step by step to create a beautiful Bronde hair color that emphasizes a bright effect around the face, while still softening the root area with a baby light technique.
This technique uses a combination of highlights with balayage, and is so easy to do!
The idea behind using the foils with the balayage technique is to soften the clients natural hair color and create a subtlety of warmth, while still adding a bright hair color toward the ends.
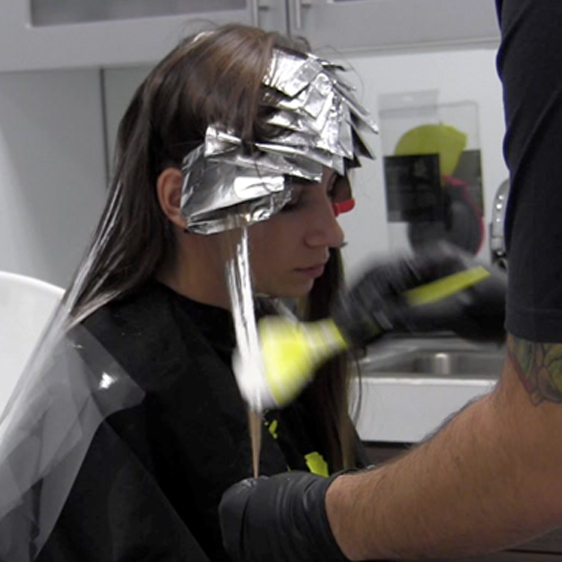
Throughout this entire process I used Colortrak’s Pop Up Foil, Balayage Brush, Board and Professional Haircoloring Film. The beauty of this film is that it doesn’t stick to itself like regular plastic wrap. This film is CLING-FREE and much easier to use.
Formulas:
Formulation A – Davines A New Colour 000 with 30 Volume Developer
Formulation B – Pravana’s Balayage Bleach and Strong Activator
Formulation C – Glazed Color using Redken Shades Eq ¾ 9GI and ¼ 9V
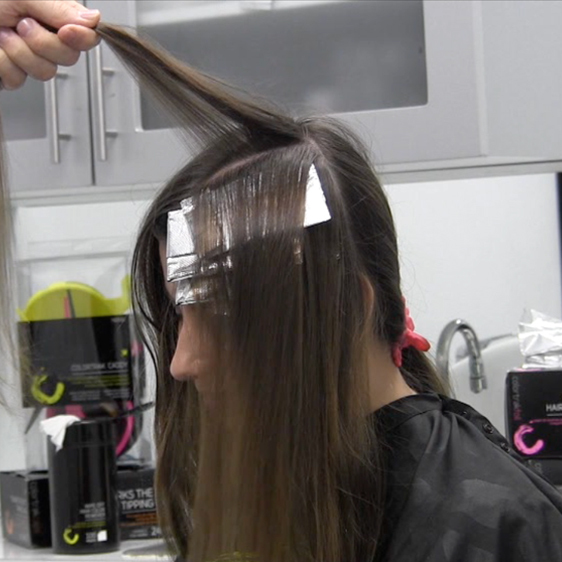
1. Begin by dividing the hair from front to back. Also, create one section to the right, and one section to the left. Secure with your Colortrak Croc Clips or Voluminous Clips.
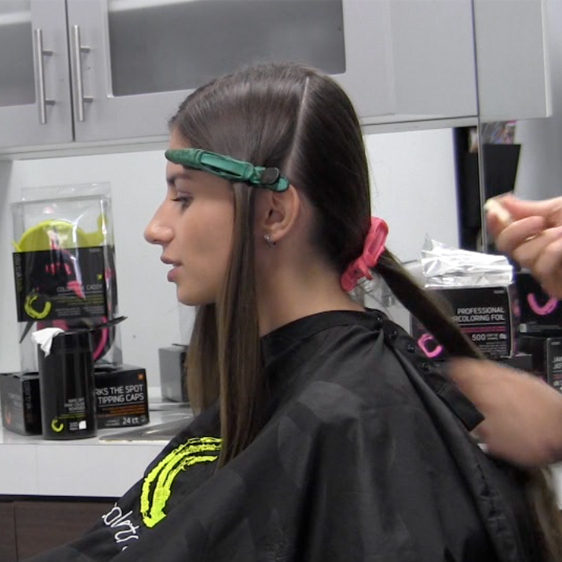
2. Begin applying Formulation A throughout the entire foil application. For the foil application, take diagonal back sections that are directed from the font hairline.
3. Each section should be diagonally placed going back from the previous section.
4. Continue until you reach the part line, and repeat the process on the opposite side.
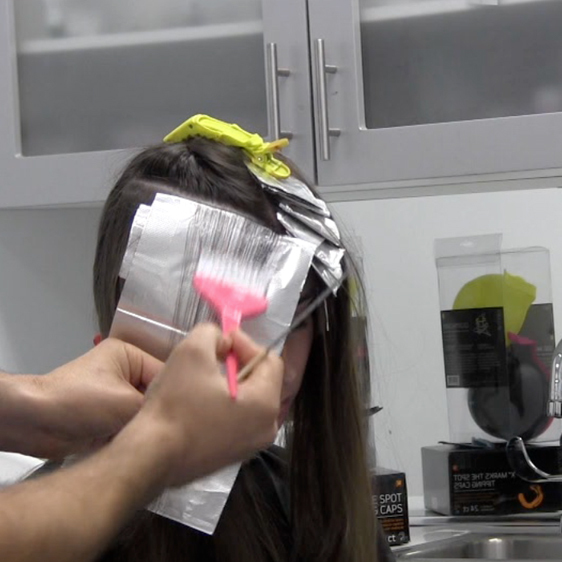
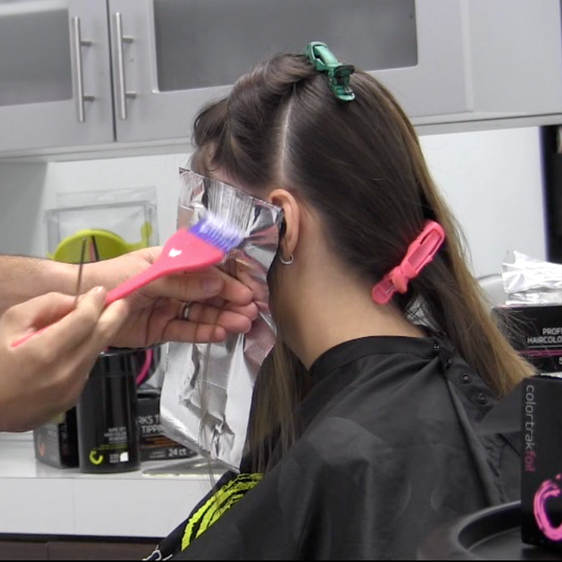
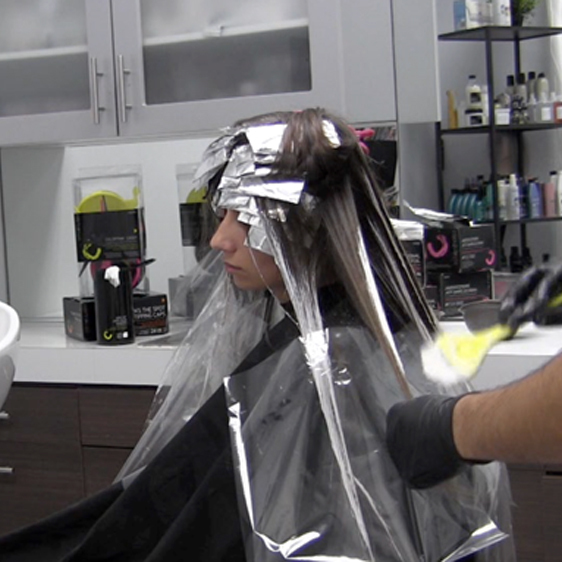
5. Once your highlighting technique is completed on both sides in the front, move to the back sections and begin your balayage color application. Fuse the color slightly from the root area to the ends using Formulation B.
6. Continue working your way up until you reach the crown, making sure to apply Formulation B heavily toward the ends. I am using the Balayage Film towards the ends only, to help produce more heat in order to create a brighter result.

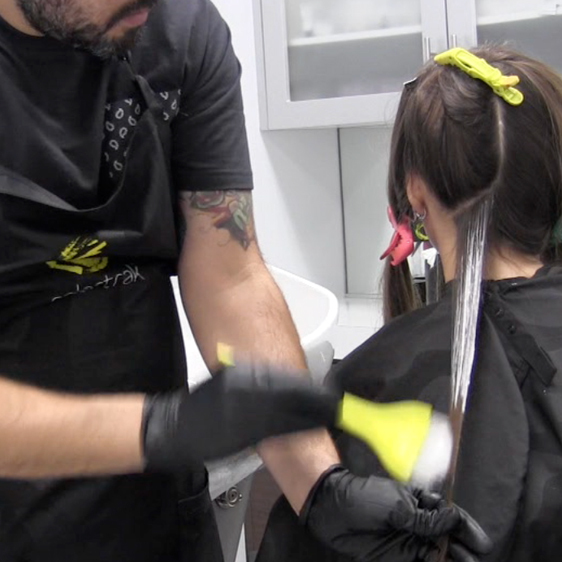
7. Repeat the process on the opposite side. Notice that throughout the entire process each section is taken in a diagonal manner, overlapping the previous section in order to soften the color line, and create more saturation of color towards the middle and ends.
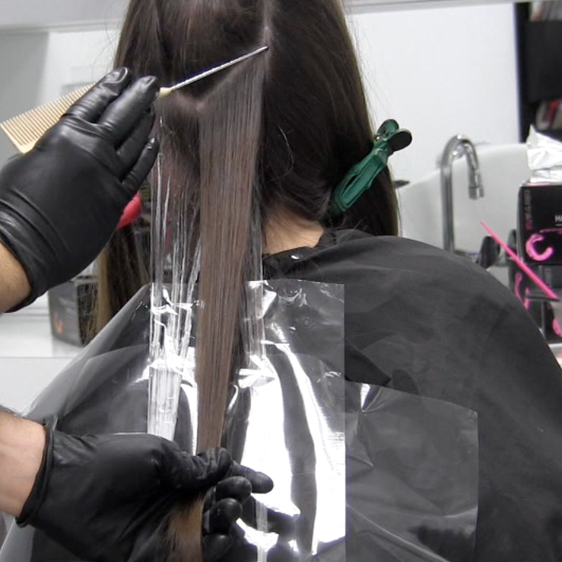
8. Begin your balayage application toward the front sections. When applying your color, only apply the color to the hair that falls through the foils, do not lift the foils up to apply the color closer to the root area; this will emphasize a brighter effect of color toward the ends.
9. Repeat the process on the opposite side.
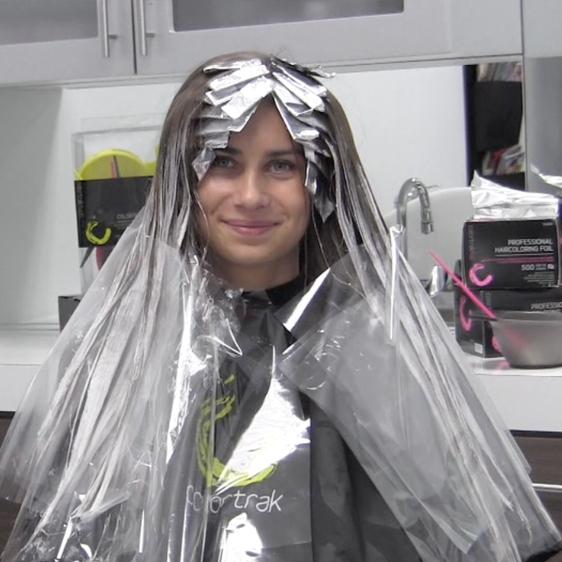
10. Allow the color to process and then glaze using Formulation C.
For more color tips be sure to stalk colortrak on Bangstyle!