We can’t decide what loved more this season, the finger wave revival or the braids that seriously slayed at fashion week. As you begin to dive into the next season of styles, lets take the swoon-worthy looks from the catwalk to the sidewalk.
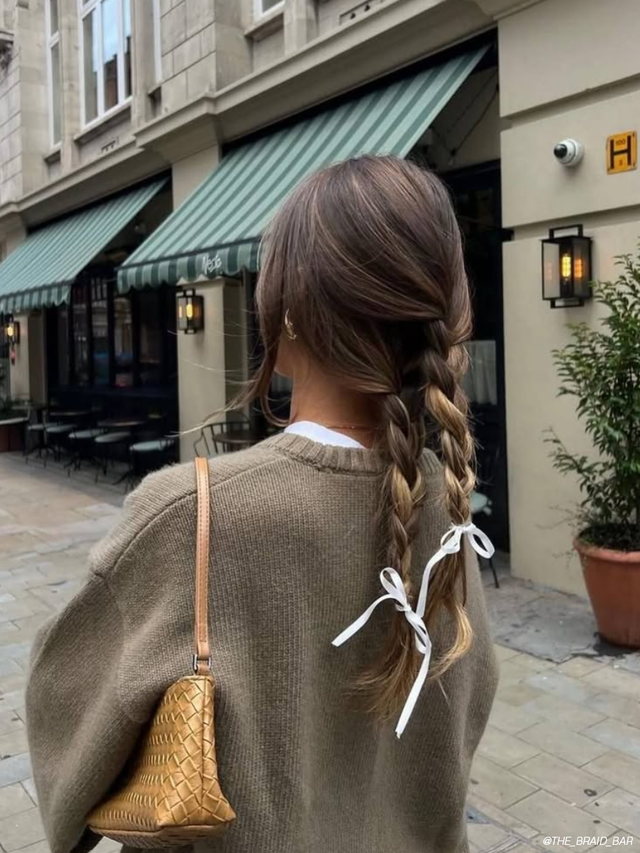
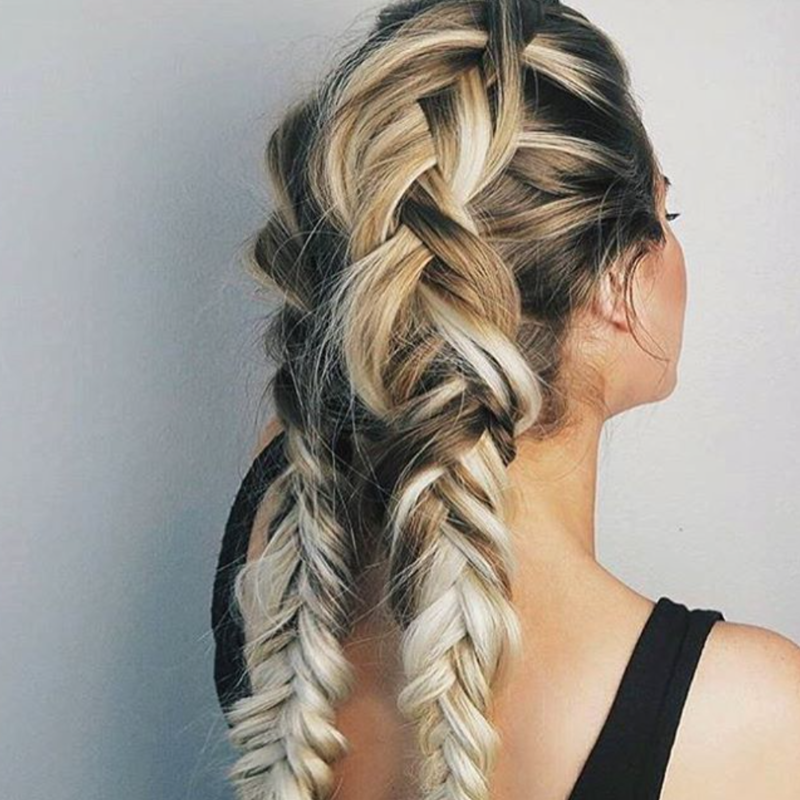
Go Double Dutch: This style, also known as an “inside-out” braid, is simply an inverted braid. By using the proper products you can turn this braid into a chic look for day and night.
Style: @sarah.nourse
On smooth, styled hair, apply Windblown 05 to begin your style, applying evenly throughout hair to add tousled texture.
Split your hair in two and aim for loose knit braids.
Once you've finished braiding, hold the ends taught and begin to pull pieces to fan out the braid a bit, creating a more bohemian look.
After repeating on the other side, pull a few extra pieces out around the face to add a soft frame.
Spritz all over with Fashion Work 12 to hold your style in place with a more flexible hold.
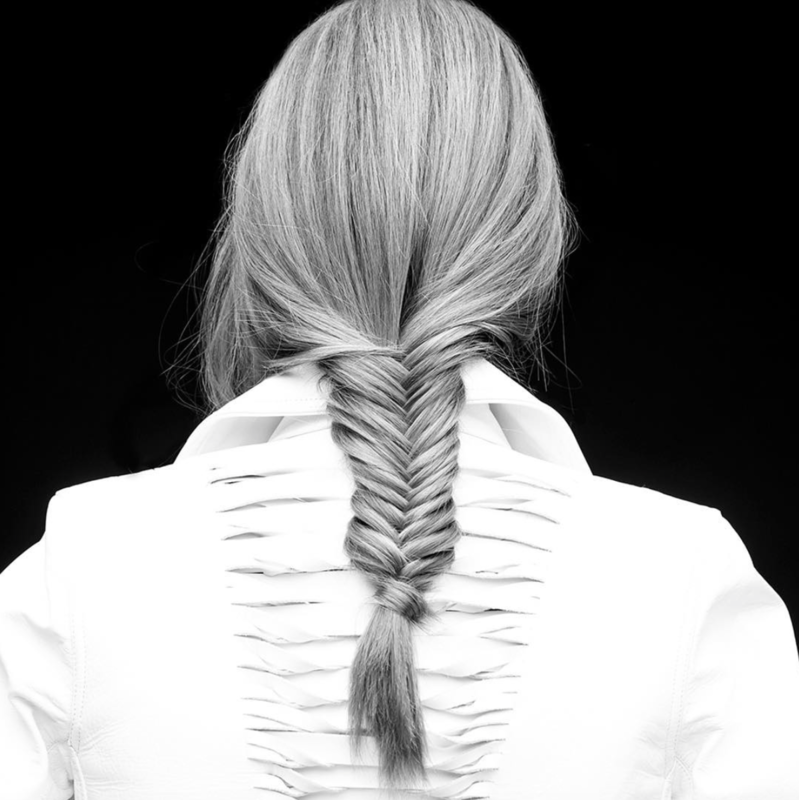
Feeling The Fishtail: The fun part about this style is that it can be an accent to a ponytail, a half-up half-down look, or simply an accent braid. It is not drastically different than a regular braid, but will leave your friends with total hair envy.
Style: Redken Artist - Adina Doss @mastery_ad
Wherever you decide to put the fishtail, start off by giving your strands a spritz of Fashion Waves 07 to give your fishtail movement.
Simply part your section in two and begin weaving smaller subsections from opposing sides back and forth into the larger [two] sections. .
You can take exact partings each time, or mix it up with alternating thicknesses for a twist on the classic.
Just be sure to keep two distinct sections at all times.
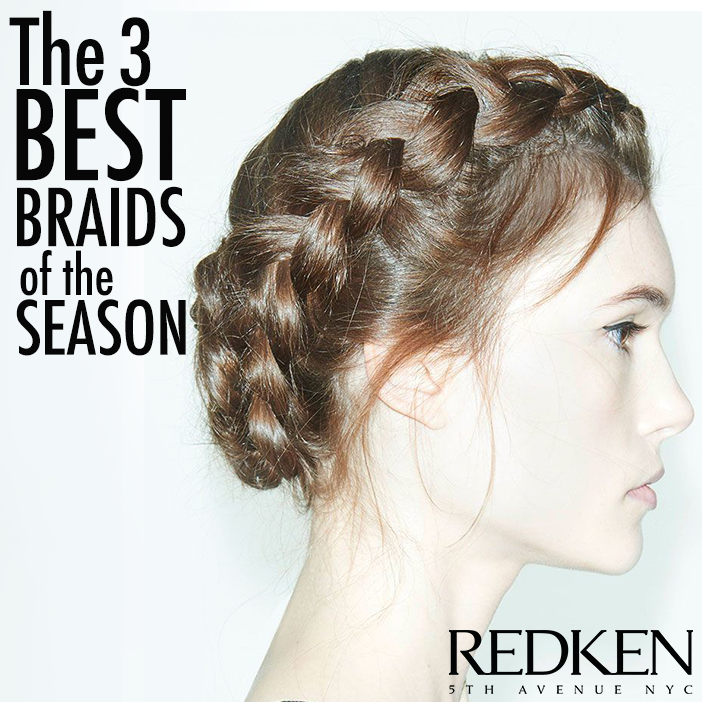
Go For The Gold, With A Crown – Although this style may seem daunting, it is totally worth it. Wearing a crown braid is reminiscent of flowers in our hair and long flowing dresses with a warm breeze on our face.

To achieve the perfect crown braid, prep hair with Braid Aid 03, it will define your braid by adding smoothness; yet give it grit so it doesn’t fall flat.
Begin by parting your hair how you normally wear it. From there, create two large sections, part starting from your natural part and continuing to the nape of the neck.
Adding a dab of Braid Aid 03 to your fingertips, start a dutch braid from the nape of your neck around the perimeter of your head, bringing it closer to your ears than the crown of your head.
Dutch braid this section until it meets your natural part and then finish the braid off scalp and secure with an elastic.
On the other side of your head, begin your braid at the front and braid it back around the perimeter of the head to meet the nape of the neck. Once it meets the other section finish the braid off scalp and secure with an elastic.
To finish the look, bring the end of the first braid across the front bang area, meeting with the beginning of the second braid and secure with a bobby pin. Do the same to the braid at the nape of the neck.
For a more ethereal look, pull the braid apart and keep out tendrils around the face prior to pinning. For a sleek look simply apply Shine Flash 02 to seal in the style and add shine.
If you’re anything like us, your love affair with braiding has just begun, be sure to stalk Redken, and check back for more even more inspiration and tutorials ahead!