HOW-TO: ROCKER.BILLY UPDO FOR LONG HAIR
The ROCKER.BILLY look was crafted by Kevin Murphy as a fun homage to the rockabilly scene, and is a great primer for anyone wanting to master the art of hair sewing.
Hair sewing is a technique that works wonderfully if your client has very thick or heavy hair that won’t hold with bobby pins. It also allows you to create more innovative styles where pins have a harder time standing up to the challenge.
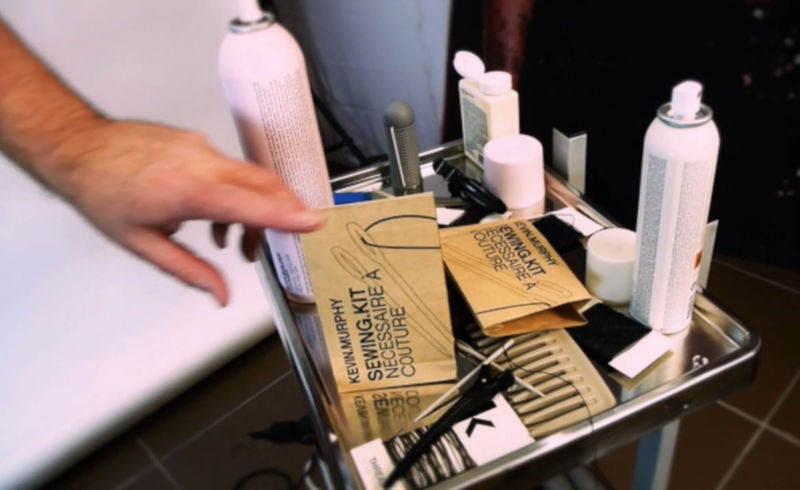
If the thought of bringing sewing needles anywhere near your client terrifies you, rest easy knowing that Kevin has created his SEWING.KIT with the stylist in mind. This kit comes with two plastic needles and durable linen thread in brown, black, and blonde, which uses its tiny imbrications to hold onto the hair.
DIRECTIONS
Step 1: Apply BODY.BUILDER to dry hair throughout the front and side areas for some extra maneuverability and control.
Step 2: Create an upper section by drawing a part from the corner of each eyebrow up to the crown. Clip this portion of hair away for now.
Step 3: The next areas you'll want to focus on are the side triangle sections shaped from the creation of the top section. Lightly apply a little more BODY.BUILDER from the base of your client's hair through the mid-lengths of the side sections. Use a SMOOTHING.BRUSH for more control as you work the product in and shape the hair tightly to the center.
Step 4: Using a TAIL.COMB, draw another line from the point of the top section to the hairline. Smooth this section to the center and secure with a clip. Repeat this step on the opposite side.
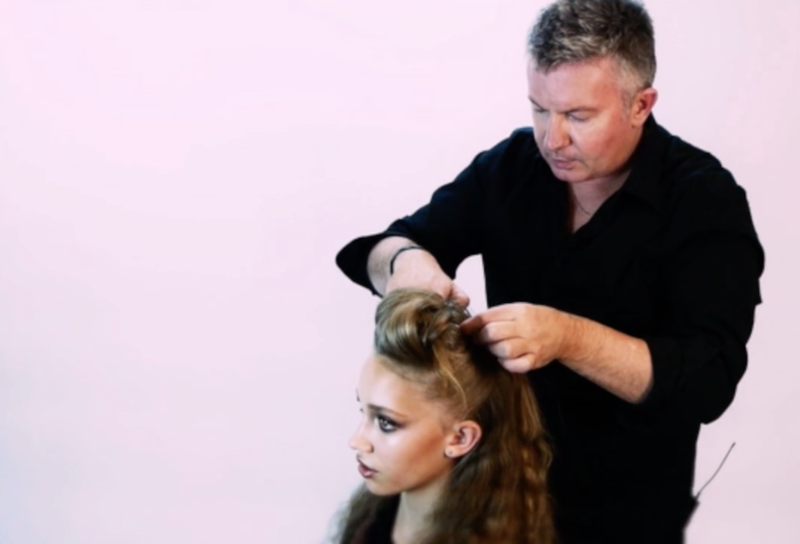
Step 5: Now the fun starts! Grab your SEWING.KIT and pull out the linen thread that most closely matches the shade of your client’s hair. Pull just about an arm’s length away from the spool and cut, then double-knot your thread to one of the blunt plastic needles provided.
Step 6: Remove the clips holding back your client’s side sections and bring them together, smoothing out any bumps for a sleek, clean look. Hold this section between your middle and index finders (making the shape of a pair of scissors) for a flat and snug grip.

Step 7: At the very top of this section, create three (3) loops around the hair before applying any kind of tension. Once this anchor is in place, start working your way down the section and pull the hair in with each loop. Use a blanket stitch to secure your work when you get to the bottom and snip the string.
Step 8: Unclip the upper section and apply more BODY.BUILDER with a focus on the roots.
Step 9: Beginning at the front of the section, use a tail comb to heavily tease the roots and get lighter with your teasing as you work through the mid-lengths and ends. You can lessen how much you tease the hair as you make your way back in the section – only the first couple inches should be teased by the time you reach the back.
Step 10: Once you’ve achieved a substantial amount of volume, smooth the hair around the parameter of the hairline, around to the back, then finally down to the ends.
Step 11: Holding the client’s hair with the lengths forward, apply more BODY.BUILDER from the base through the ends of the entire front section. Then, use your SMOOTHING.BRUSH to smooth over the outer service of the section.
Step 12: Starting at the ends, begin rolling the hair back while leaving a few inches at the end free.
Step 13: Grab your threaded SEWING.KIT needle and make three (3) loops at the scalp toward the center of the rolled hair as an anchor. Keep sewing in the same spot and bring the sides in.
Step 14: Take the ends of the hair left sitting out in Step 12 and pull them over the area where you were sewing. Do a few simple loops around this section with your SEWING.KIT needle and thread to secure it in place and hide the stitch work done in Step 13.
For more hairstyle tutorials and inspiration, stalk KEVIN.MURPHY on Bangstyle and follow them on Instagram!