As Fashion Weeks come to a close braids are being seen everywhere! Sherri Jessee gives us the ultimate dose of inspiration by detailing some of her favorite braids. Follow along below to see her top styles and the steps to get the looks!
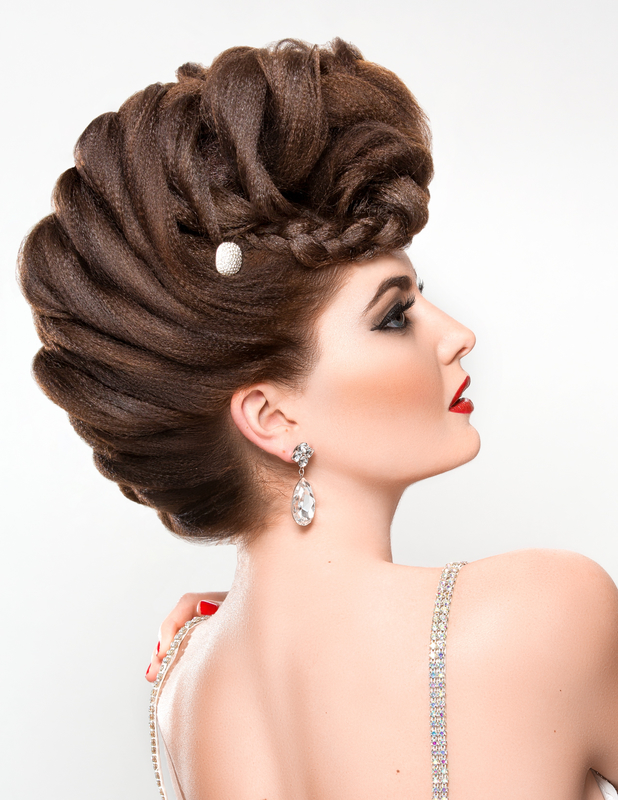
FRENCH BRAID FAUX HAWK
1.Lightly Micro Crimp for incredible texture with a Sam Villa Texture Iron.
2.Begin a classic French Braid at the nape of the neck and work toward top of the head.
3.If you desire added height, pin a hair pad to the top of the head and conceal it as you braid.
4.Secure the end of the braid and decorate with a hair clip.
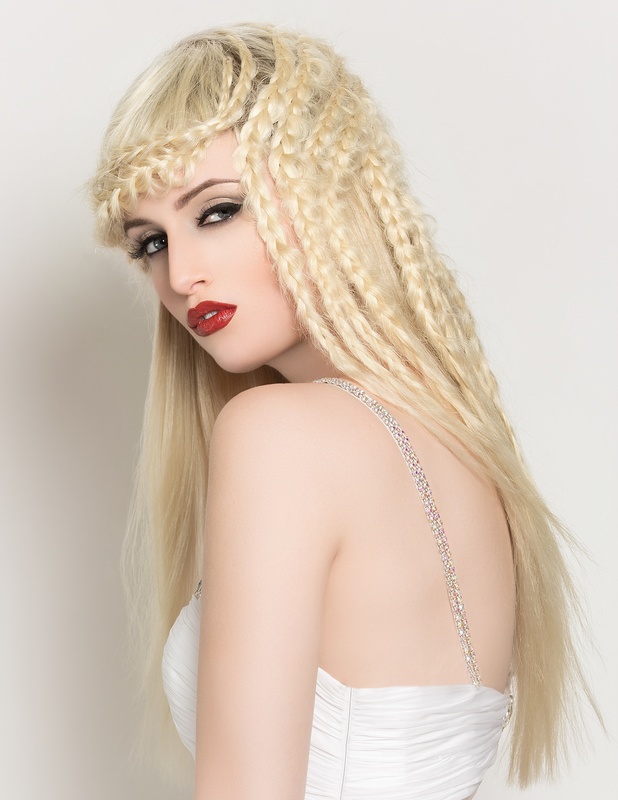
MULTI-STRAND BRAIDS
This braid reminds me of the wonderful styles worn by Khaleesi on The Game of Thrones. For added interest, have the braid sweep across the forehead like a bang.
1.Begin at the crown of the head and do a series of French braid corn rows. Be sure to only gather new hair from the top side.
2.Gently pull the braids out to make them appear larger and have more texture.
3.Secure each braid with the tiniest of clear silicone bands.
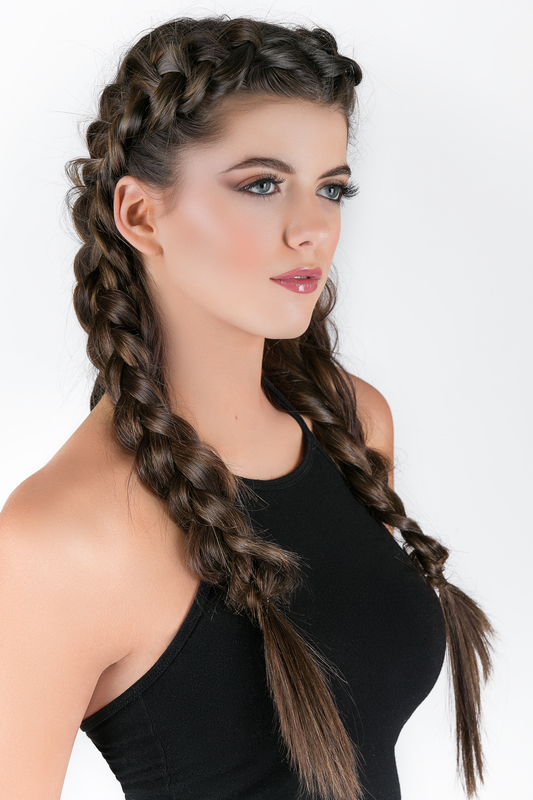
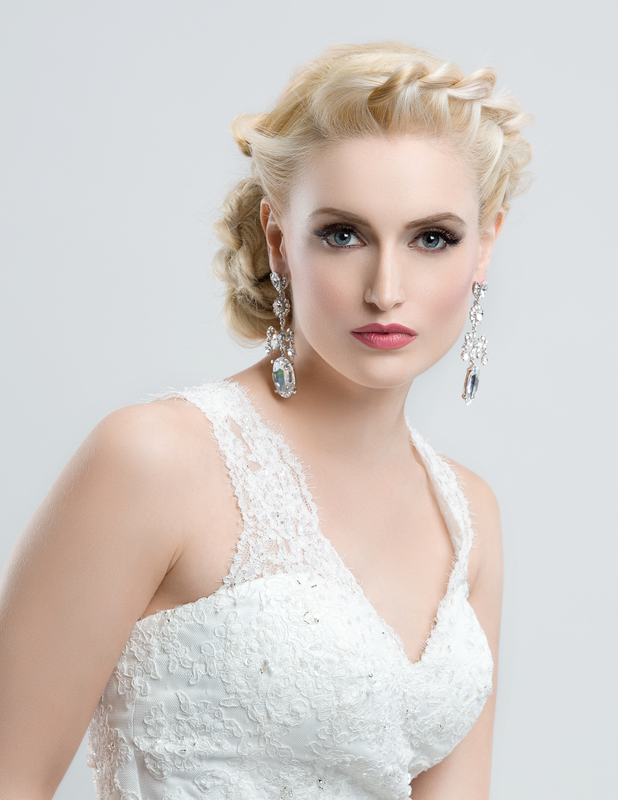
TWIN DUTCH BRAIDS
This braid is clean and neat and gives maximum control to long hair.
1.Separate the hair from front to back into two even sections.
2.Do a Dutch braid on each side. Begin at the center front and work your way down. As you gather in new hair, be sure to cross the hair under to create the dimension of a Dutch braid.
3.Gently pull out the braid to make it larger and more romantic.
It is easier if you don’t make your braid too tight from the beginning…begin at the bottom and be sure to leave out enough hair at the ends to that you can fatten up the braid.
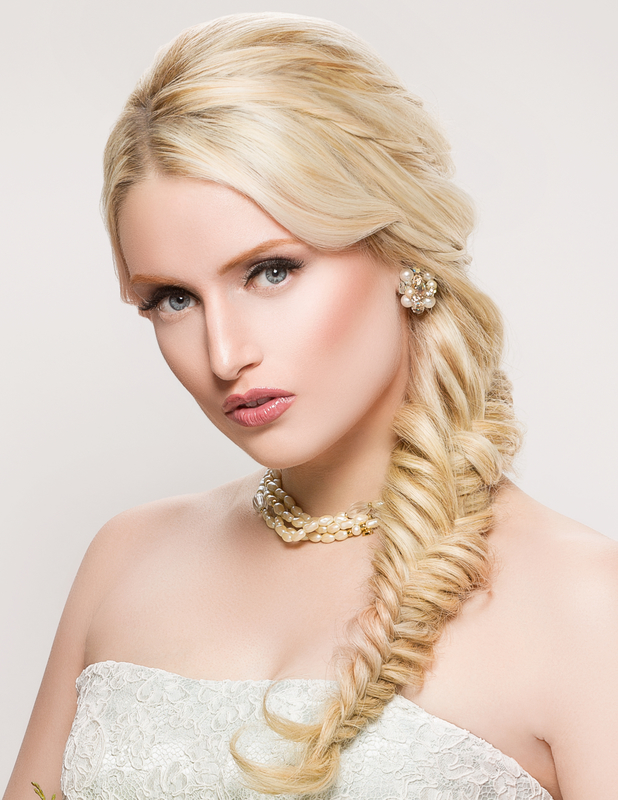
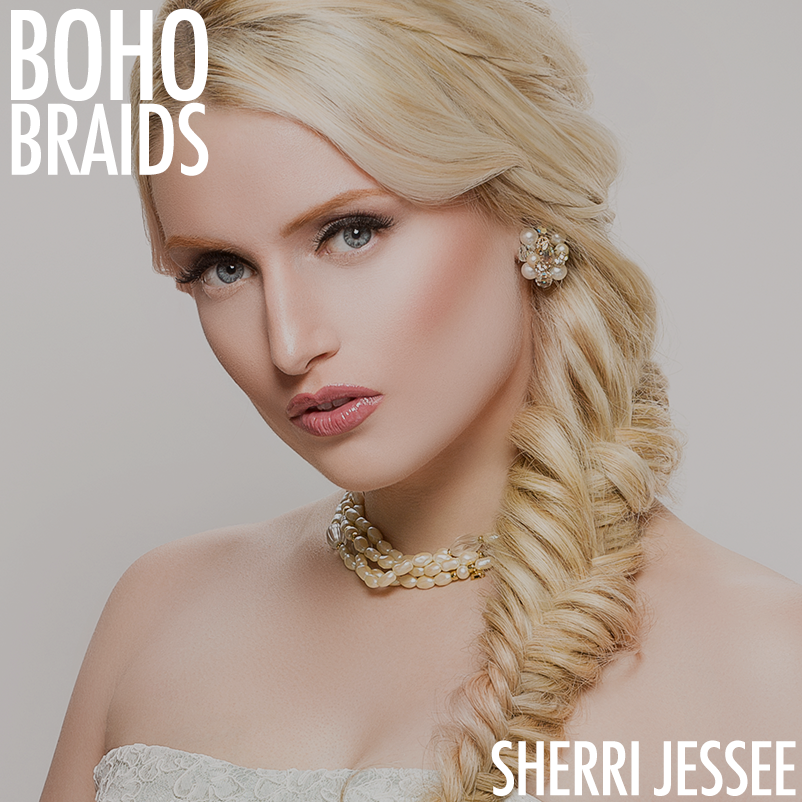
FISHBONE BRAID
This is a wonderful braid for brides. You can also twist the braid up to create a chic chignon.
1.Sweep hair over to one side and begin a Fishtail braid.
2.Take a small section from the back on the left and cross it over to the right side.
3.Take a small section of hair from the back on the right and cross it over to the left side.
4.Repeat the process until you get to the bottom.
5.Begin at the bottom and work your way to the top gently pulling out strands to make the braid larger.
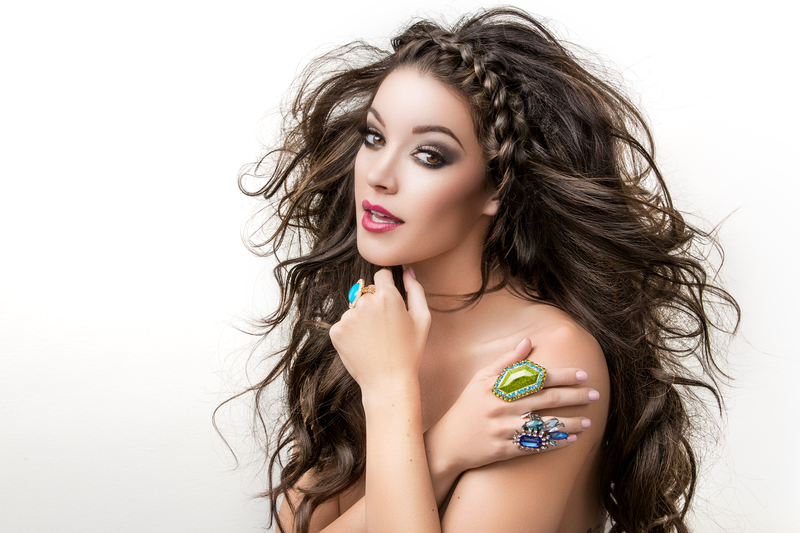
THE HEADBAND BRAID
This is a great look to frame the face.
ROPE BRAID
Rope braids are quick to create and and are great to pull out for texture.
1.Carve in a deep side part and create a traveling rope braid framing the face. For your rope, divide into 2 sections. Hold the hair tightly and twist the left section to the left and then wrap to the right.
2.Repeat and gather more hair each time you twist to the left and wrap to the right.
3.Create a traveling rope braid on the opposite side. This time twist to the right and wrap to the left.
For even more style inspiration, be sure to stalk Sherri Jessee on Bangstyle and check out all of her tutorials here!