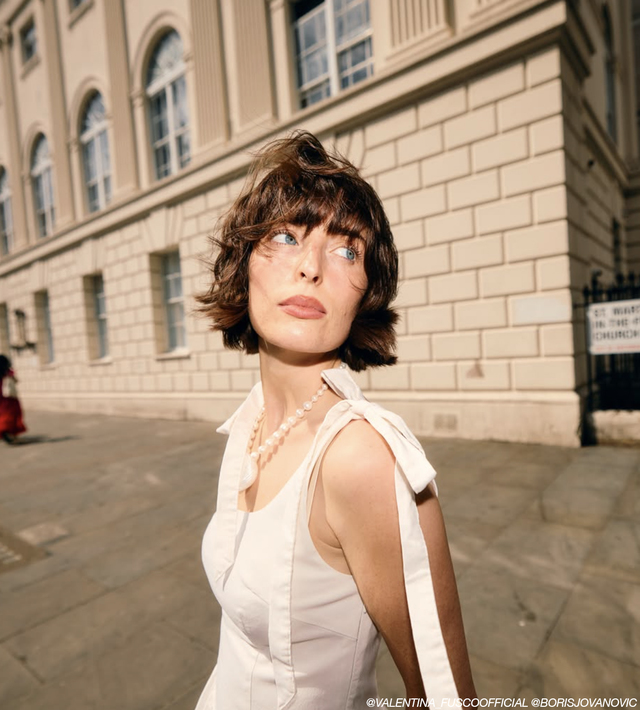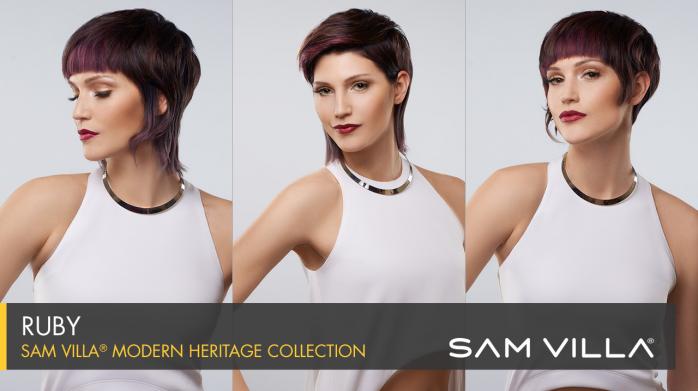
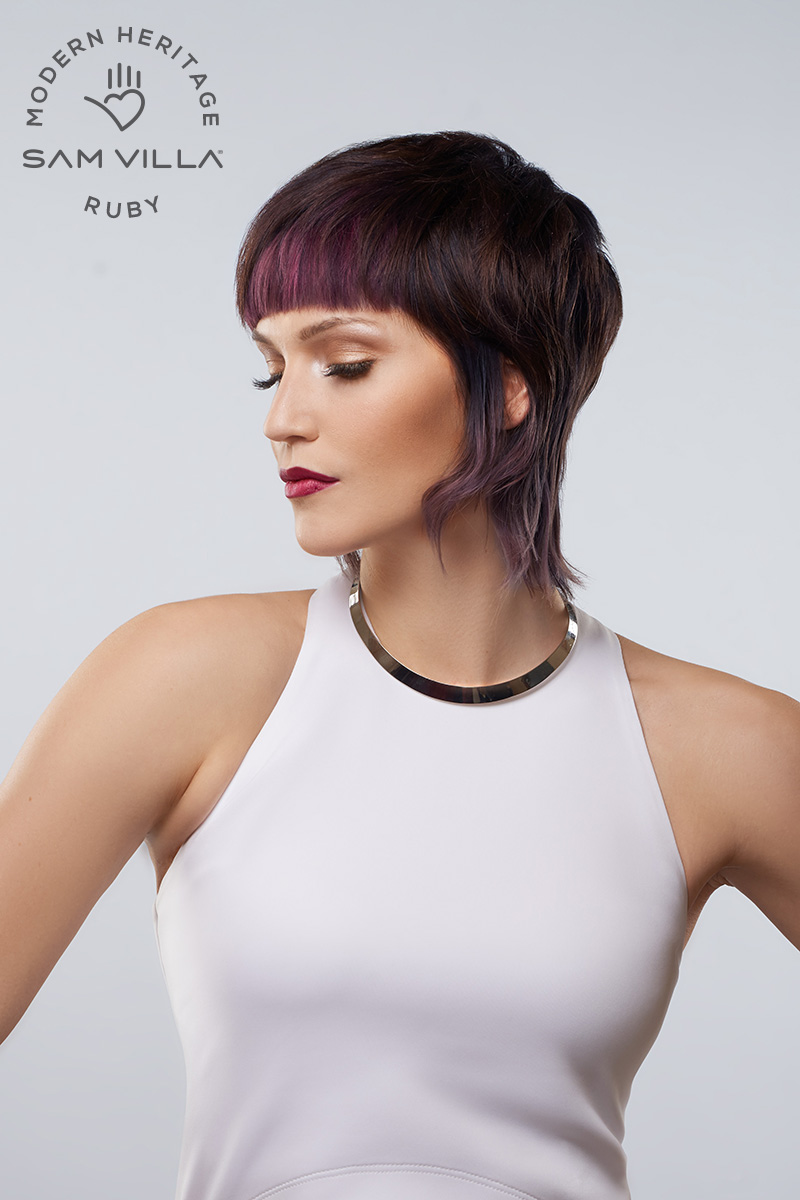
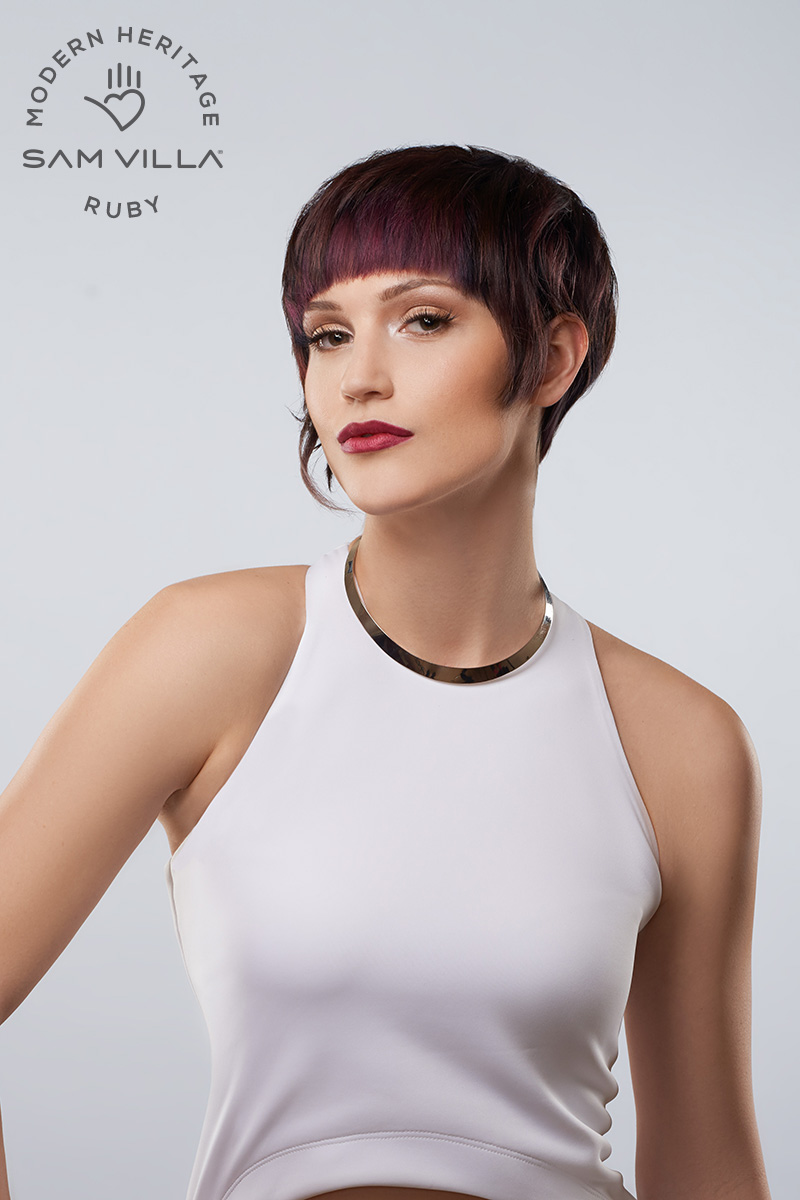
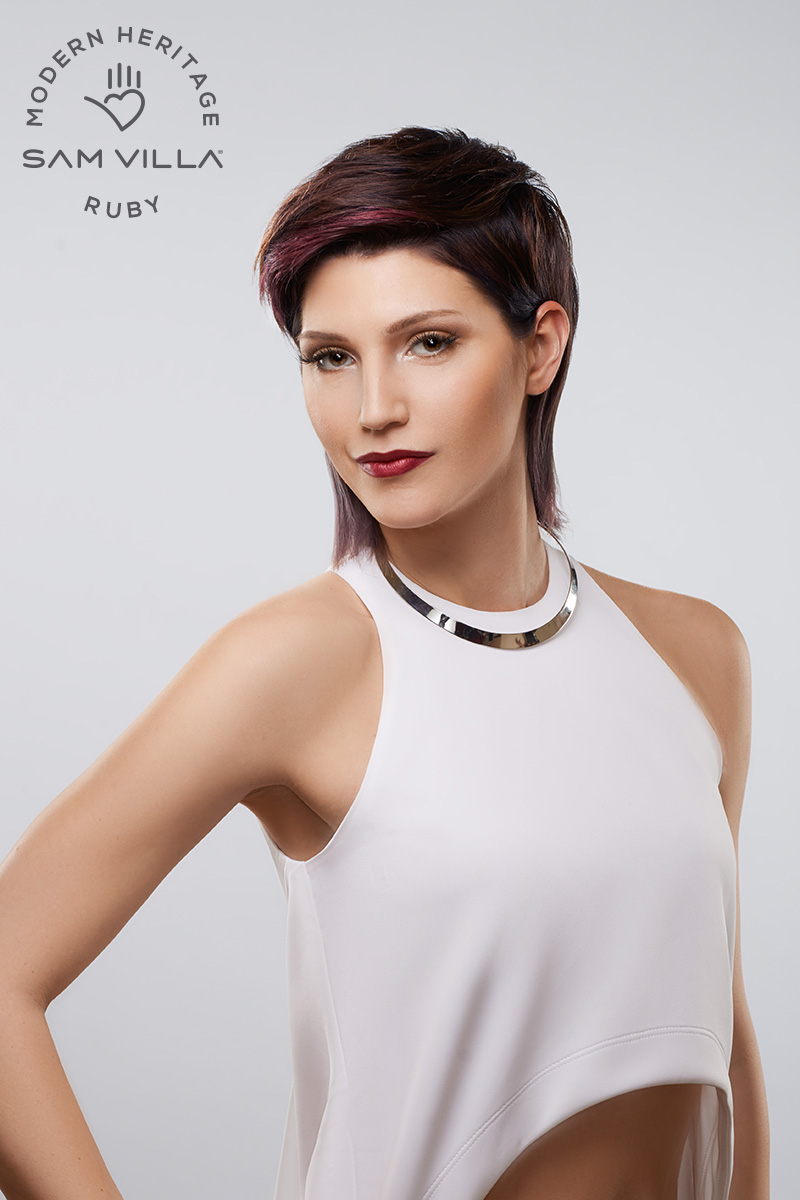
The Modern Heritage collection is all about discovering how our hairdressing legacy Influences today's trends. The Ruby haircut embraces the essence of the 70s with short detached surface layers and extended perimeter lengths. Imagine taking the best part of that free spirited rock and roll era and infusing that into today's clientele!
Utilizing multiple razor techniques and even multiple types of blades, the Ruby will challenge you to expand your cutting past traditional approaches while fine tuning your technical process. Today's salon guest is always looking for more value, so we have included creative and approachable examples of alternate styling to give your guest multiple identities from one shape!
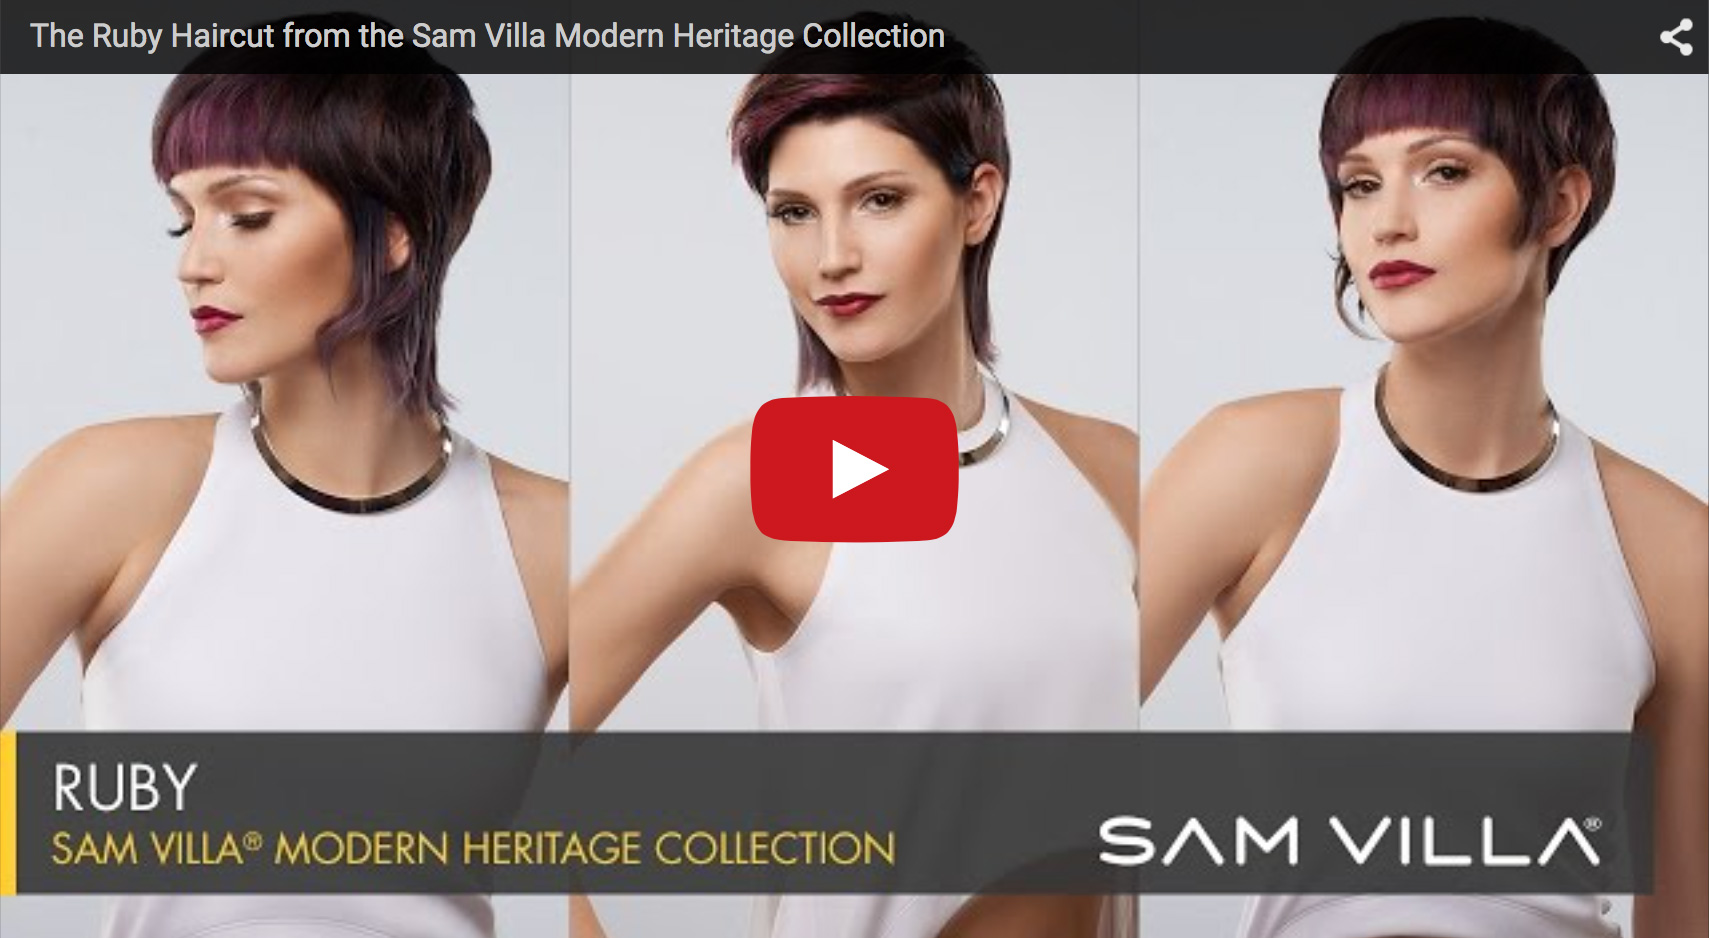
OWN THE RUBY HAIRCUT FOR ONLY $5! Watch the trailer below!
Keep scrolling to get the step by step details for the Ruby!
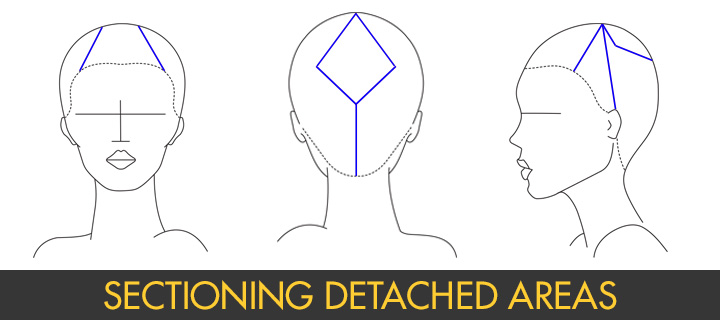
SECTIONING
Begin by preparing the hair with the best products that will set you up for the haircut. We recommend layering Redken Satinwear 02 + Redken Diamond Oil shatterproof shine. This combination will add the perfect amount of moisture & slip.
Divide the hair into quadrants - section from the high point to just behind the ear to connect to the hairline on both sides and then a center part from forehead to high point and high point to center nape.
Section off detached areas:
• Front: Create a wide fringe area from about an inch off center on the ear to ear parting to just below the recession area.
• Crown: Create a triangular detachment from high point to corner back and then to high occipital.
INTERIOR
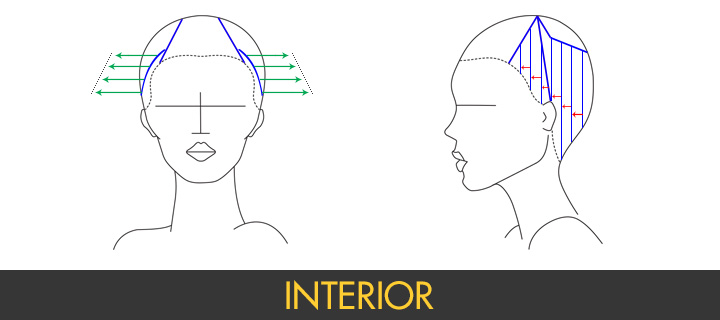
Once both of the detachments are clipped securely out of the way, create a 1 inch vertical section at the hairline on either side. Elevate the section to 90 degrees horizontal, overdirect forward slightly, and establish a diagonal finger angle that is shorter at the top and longer at the perimeter.
Using a circular motion with the Sam Villa Signature Series Razor with the straight blade, follow your finger angle and create lots of texture as you cut. Length at the perimeter is up to your personal taste. In our benchmark, length at the perimeter was about 2-3 inches past the jaw.
HOT TIP: So that you don’t create excess length at the perimeter, lock your finger position in place so that you do not slide your hand away as you cut. With a guarded straight blade, the blade can touch your skin without cutting it.
Mirror this section on the opposite side and crosscheck
Continue towards the center back by taking 1/2 inch of new hair and 1/2 inch of the previously cut section as your guide. Section angle, elevation, and finger angle all remain the same and overdirection is forward to the previously cut section.
Stop at center back and go back to your first section on the opposite side.
Use horizontal sections across the center back to crosscheck your lengths side to side and blend them together.
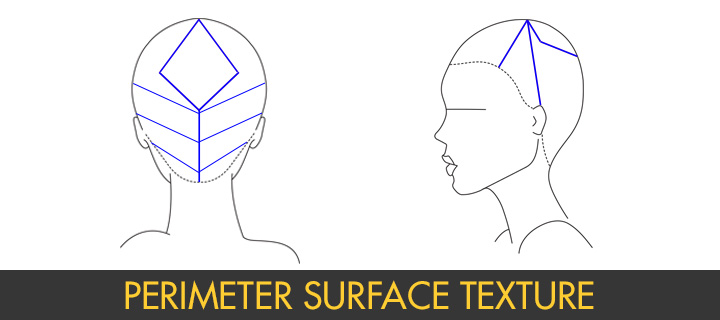
PEREIMETER
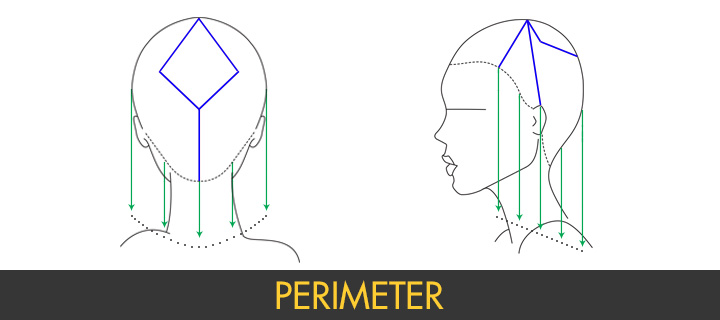
Create your perimeter line by allowing the hair to hang at natural fall and visually pinch and cut pieces with the razor. The angle of the perimeter is a slight diagonal back and should have a vandalized texture.
To create a more airy feel, switch to the 6 gap blade for the razor. Take diagonal back sections, hold them at a low elevation and glide the razor along the surface holding it parallel to the section.
• You can be more aggressive towards the scalp on the areas closer to the perimeter (especially in the back of the head) and then as you move closer to the top start a bit farther away from the head to prevent pieces that may stick out.
Once you are happy with this underneath area use the Sam Villa Dry Cutting Clips to secure the hair so that when you cut the upper detachments, you don’t cut into the area below.
FRONT DETACHMENT
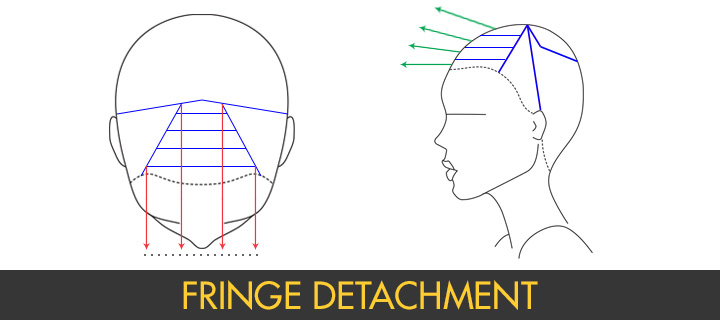
In the top front detachment, begin at the front hairline and take a 1 inch horizontal section from side to side. Elevate this just below 90 degrees from the headshape, overdirect forward to a flat plane (imagine an imaginary wall in front of the face), lock in a finger angle that mimics your flat plane, and use the 9 gap razor to surface cut parallel with the section. Length for this section should sit at the top edge of the brow bone.
• HOT TIP: By approaching the section parallel with the 9 gap razor, you will need to move slightly back and forth as you cut and will take a few passes on the same area to remove all of the hair. This will allow for a nice horizontal line to be created with maximum softness.Continue in horizontal sections working back towards the high point of the head. Maintain the same elevation, overdirection, finger angle, and cutting method. Keeping the elevation just below 90 degrees from the shape of the head will build a bit of length and weight towards the high point of the head.
CROWN DETACHMENT
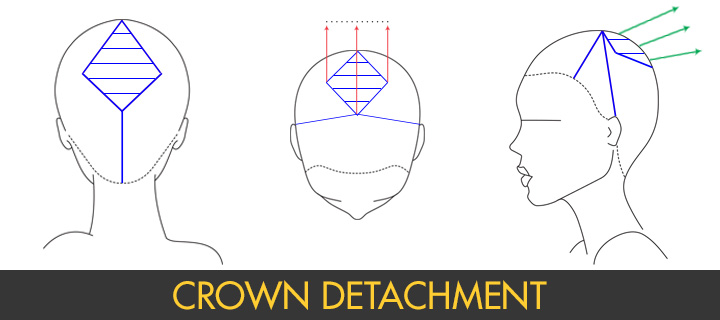
For the detachment in the crown, use the exact same technique as the front detachment. Starting length should sit at the bottom edge of the occipital.
BLOW DRY
Product is not an option, it's a necessity! Begin by misting Redken Pillow Proof Primer throughout the hair - this will speed up the blow drying time and help protect from the heat. Next, spray Redken Fashion Waves 07 a sea salt texturizing spray throughout the hair to add texture and body.
Using the Sam Villa Professional Ionic Blow Dryer on medium air flow and high heat, use your hands to manipulate the natural texture. Make sure the air is always headed from scalp to ends and use more a of a twisting motion with your fingers to define pieces. Resist the urge to shake the hair which will create a frizzy texture.
In the fringe area, use the fine teeth of the Sam Villa Long Cutting Comb to wrap dry towards the face. This will control any natural growth patterns and create a smoother appearance to the fringe. The dryer should stay on medium heat here to ensure your guests comfort.
Touch up the ends with the Sam Villa Sleekr Flat Iron. In areas that did not get the texture you want, you can use a back and forth “S” shaping movement with the iron to encourage a loose natural look. For more on this technique see this video.
REFINEMENT
In the fringe area, refine the perimeter line with the Sam Villa Signature Series Reversible Blending Shear to maintain the soft texture from the razor.
In the rest of the shape, use a weave cutting method with the same shear in areas that need more airiness.
FINISHING
Finish off the hairstyle with Redken Move Ability 05 a lightweight defining cream past that adds texture and subtle shine to the hair. Emulsify the product in your hands and use your fingertips to distribute the product throughout until you achieve your desired look.
The best way to learn this haircut is visually and we have the solution for you! All full haircut videos in the Modern Heritage collection are only $5! Education doesn't have to be expensive and the Sam Villa team is here to bring you the value! Click here to view the trailer for Ruby and to purchase the video for online streaming and download.
For more articles, tutorials and products visit Samvilla.com!