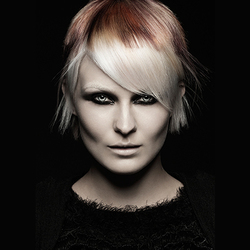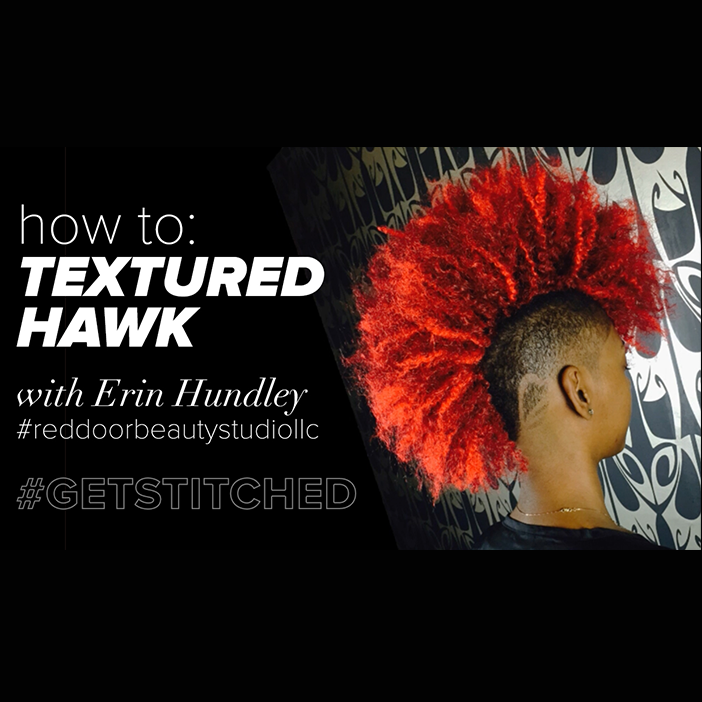
Textured Hawk How-To: Featuring The STITCH by Erin Hundley
Erin Hundley of Red Door Beauty Studio is no stranger to The STITCH by Daniel Roldan Styling CO - she creates looks that range from everyday wear to runway worthy, check out her amazing video or follow the steps below showing exactly how she used The STITCH to make this Textured Hawk style!
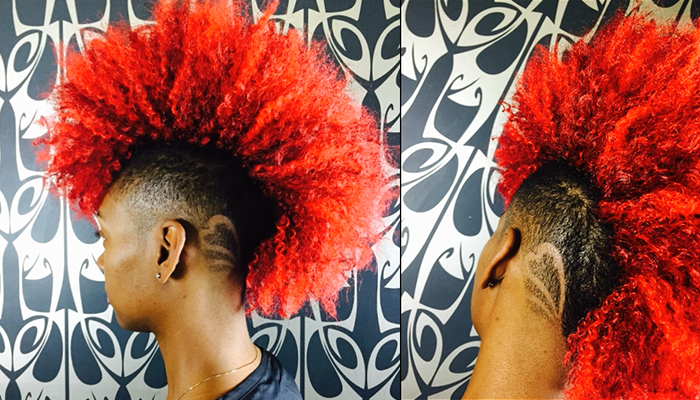
“I wanted it to be collection of things that are trending right now: undercuts, designs in the head, fauxhawks and mohawks. It’s a take on a classic ‘80s look. Everyone wants to have big hair. This allows me to create loads of volume.”
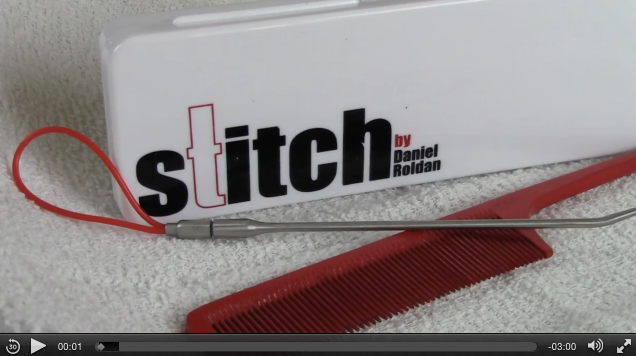
Click below to watch the video and get your STITCH here!
Step 1 Create your foundation by braiding the hair. The pattern is solely up to the individual (I chose to braid my braids towards the top center of the head). After the braid foundation is finished, secure the ends of the braids by sewing them down with a weaving needle and thread.
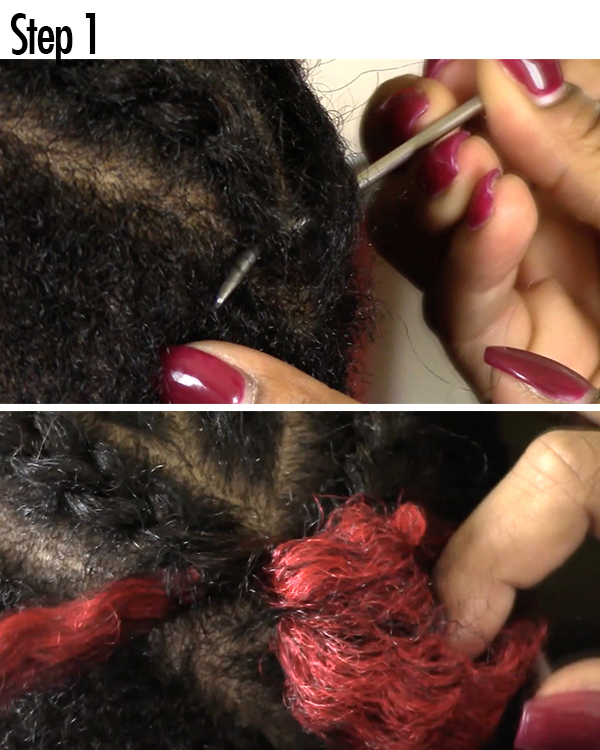
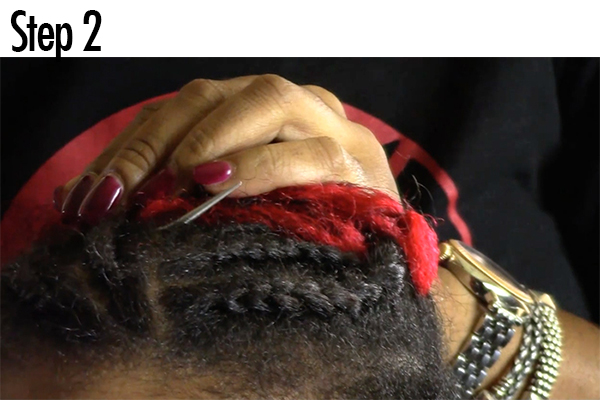
Step 2 Get your STITCH ready with the hair you are using to weave; I chose textured hair that is used to create the popular crochet weave that is popping up everywhere. Once you have secured the hair to the STITCH, begin creating the bed - I weave in and out like I am sewing to achieve this.
*The key to creating your bed is to make sure your foundation is not too tight - making it too tight will create discomfort for your client as you stitch.
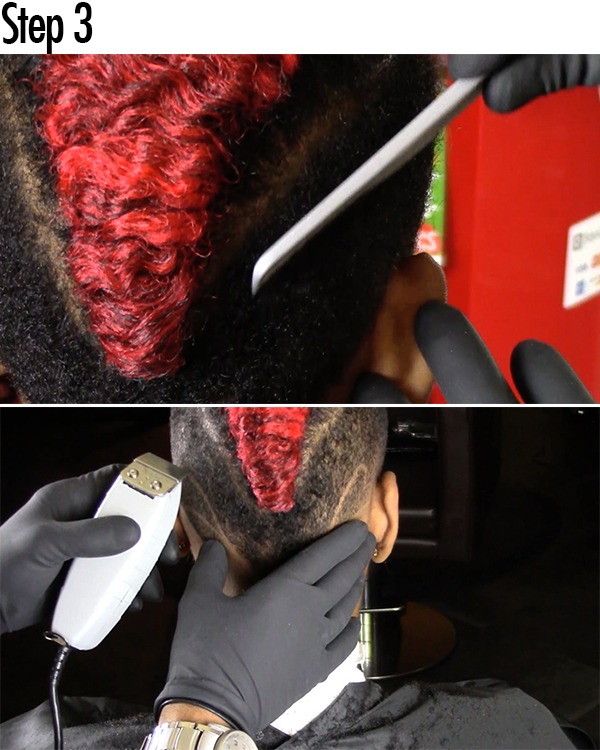
Step 3 The cutting of the sides can be done before or after. However, I prefer to do it before because my work is cleaner at the end, and the hair added to the Textured Hawk isn’t in the way.
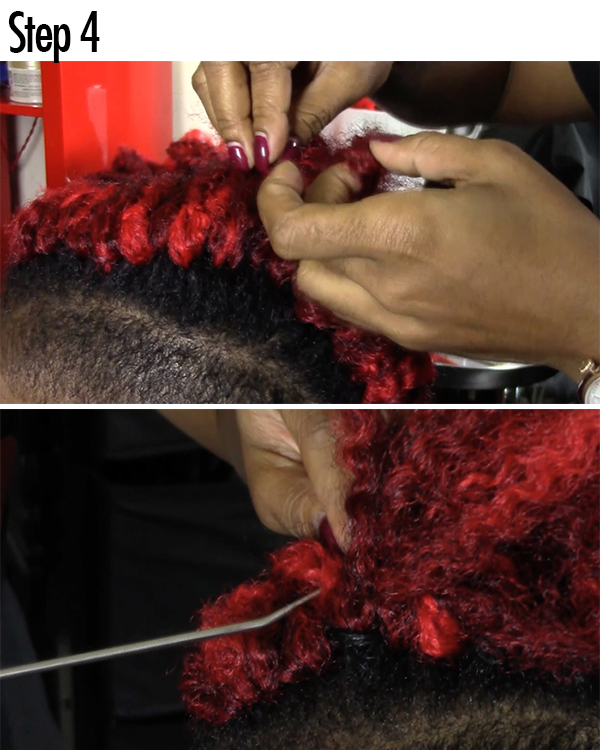
Step 4 Once your bed is complete, begin inserting the hair to create the Textured Hawk. This is the fun part; alternating between my fingers on the top and the STITCH as you move closer to the hairline and nape.
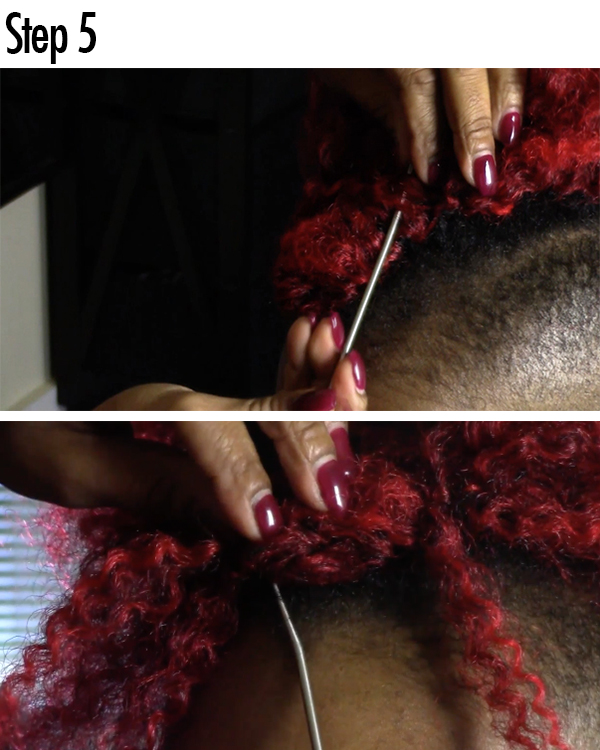
Step 5 After you fill in the majority of the top section, move to the perimeter of the hairline, filling this area in first creates a natural fall. You will also have more control of how the front will lay; whether it is to the right/left/or center.
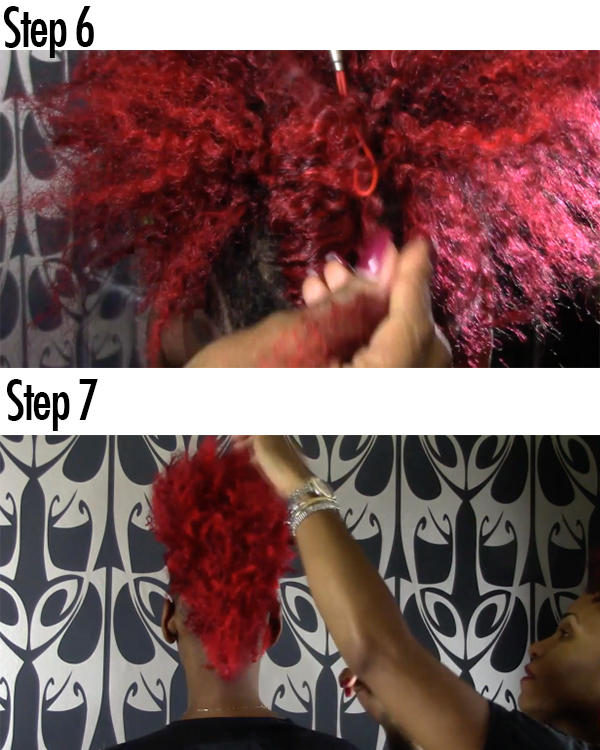
Step 6 Now that the bed is filled, begin filling in the exposed hair that was not originally covered by the bed. By loosely double looping the hair, it remains secure and will not damage your clients hair. It is imperative that the integrity of your clients’ hair remains throughout the entire process.
Step 7 Go in with shears to touch up the shape and slide cut when necessary to remove unwanted hairs.
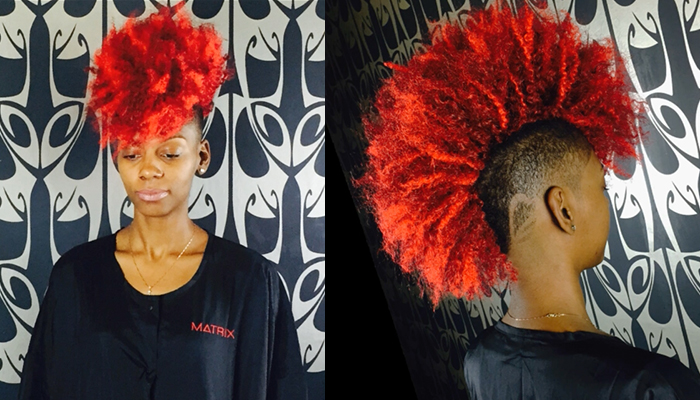
It is a bit grand wouldn’t you say?
Credits:
Hairstylist: Erin Hundley
Barber: Duane Etienne
Videographer/Editor: Denielle Dix
Music: Khyree Hart
Model: Alonda Harris
For more great styles, tips, and tricks check out Erin Hundley on Bangstyle and @Rdbeautystudio and be sure to stalk Daniel Roldan at Daniel-Roldan.com on Instagram @d_roldan to see all the latest STITCH Inspiration!