If you're a curly girl, then you likely face the daily struggle of achieving smooth strands. You use a smoothing shampoo and conditioner – like Redken Frizz Dismiss – in the shower, load up on anti-frizz serums, blow-dry your hair with a round brush, and flat iron or curl your hair multiple times weekly. As a fellow curly girl, I think it’s time we say “Enough is enough!” Why continue to fight your natural texture when women with straight hair would kill for a little curl or wave? It’s time to embrace our spirals, ringlets, kinks or curls and sport them with pride! Luckily, there are plenty of curl-friendly styles out there. From curly bangs to romantic updos, your curls are the secret to achieving soft, effortless styles—sans heat! Take a peek at some of our best tips for curls and then check out our favorite tutorials that will help you fall in love with your curly locks all over again.
Whether you take your #hairspiration from fashion week or the latest street styles, curly hair and natural waves are a thing of beauty and have created a movement that will last much longer than just a fleeting trend! There are also multiple styles that just look better with natural curls, so prepping your canvas is key. From product picks to stylist tricks, here are a few tricks for curly girls before they get to styling!
STYLE TIPS:
Say no to terry cloth, pick up a t-shirt or microfiber towel instead.
Traditional towels can cause frizz by creating extra friction between the fabric and your hair when towel-drying. Use a smooth surface to blot your curls to cut down on the separation of your curl pattern, allowing your hair to dry smoother and ultimately be more manageable.
Diffuse-dry your hair.
Whether you know it or not, your blow dryer comes with useful attachments for curly hair (and if it didn’t, invest in one that does!) The diffusing attachment is the secret for drying curly hair or adding extra texture to waves sans frizz.
Make sure hair is fully dry.
When blow drying, frizz can often happen when hair is not fully dry. You may think that your hair is fully dry, but usually, it’s not! If you are diffusing your hair, you can sometimes get away with drying your hair to about 90% and walking out the door, but if you’re going to create an upstyle or braid, you’ll need your hair to be fully dry before starting.
Deep condition, always and often!
Curly hair always needs extra moisture and condition no matter what time of the year it is. Hair that is healthy will not only curl and dry better, but it will also style better as well!
Protect with product.
No matter what environment you live in or what season of the year it is, you’re going to need a few products to protect your hair before you leave the house. Macadamia Professional Anti-Humidity Finishing Spray is a staple that any curly girl should have in their style arsenal – made for curls and will protect against frizz!
Touch up with a wand.
Prior to creating your style of choice you need your curls to look the part! Whether you’ve slept on them funny or they dried on the frizzy side, there is a quick and easy trick to get them style-ready in no time! Simply use a wand to re-curl your strands. This technique can also be used to mix your natural wave with alternating curl patterns to get an undone curled look prior to your finished look.
Keep reading for some of our favorite hairstyles for curly hair!
The Look: Messy Bun
Model Jasmine Saunders’ messy bun looks sweet and chic thanks to her golden ringlets. Ideal for Day 2 or Day 3 hair, this casual style highlights your texture and allows your natural volume to take center stage.
STEP 1. Pull the hair into a high ponytail and secure it with a clear elastic.
STEP 2. Wrap the ponytail into a bun and secure it with a clear elastic.
STEP 3. Holding the bun at the base, gently pull the bun in different directions to add fullness. Wrap any loose ends around the bun and pin into place.
STEP 4. Gently pull the hair at the crown to add volume, then pull out a few face-framing tendrils and finish with hairspray.
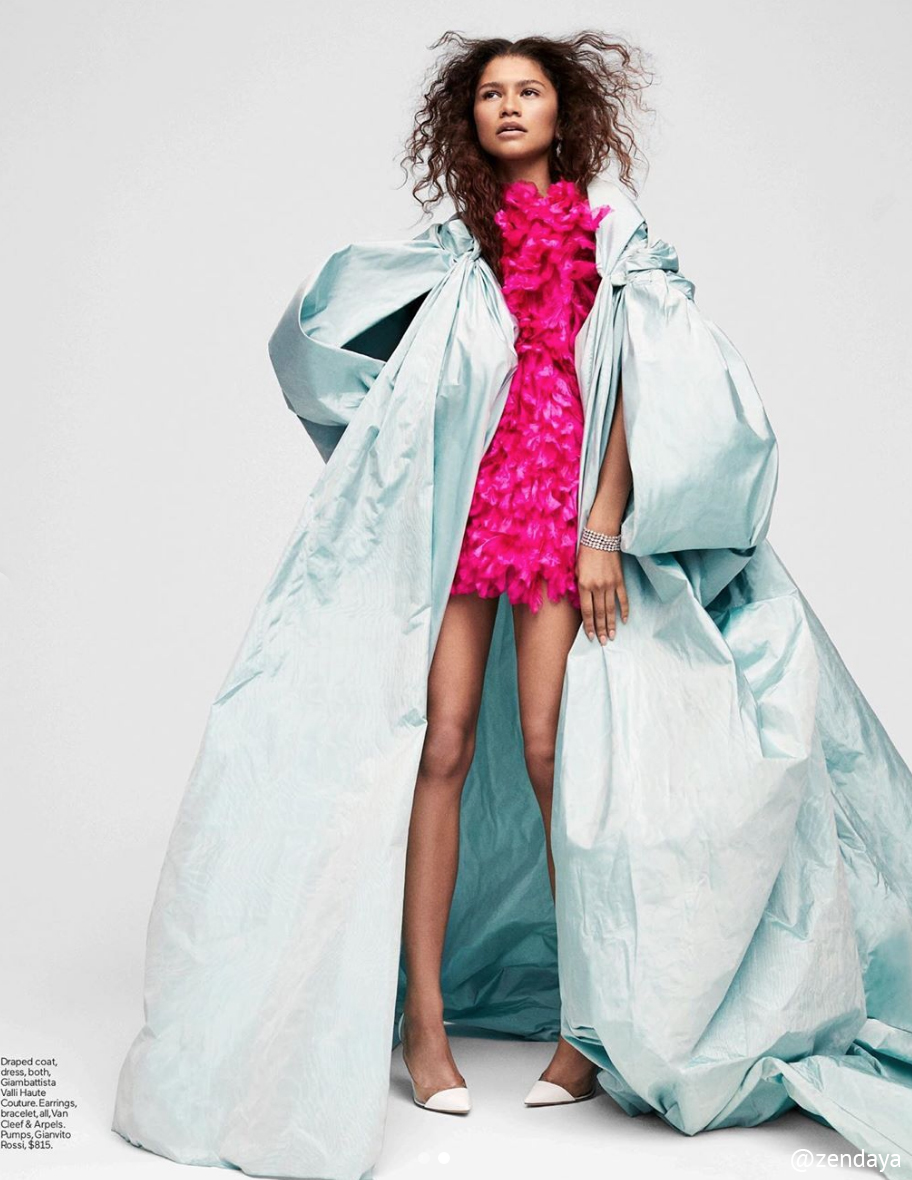
The Look: Curly Bangs
Zendaya is finally empowering curly girls everywhere to cut their fringe! The best part? Textured bangs look edgier and more modern than traditional fringe. What’s more, embracing your curls is a surefire way to avoid the dreaded “bubble effect” that can occur after blow-drying your bangs!
STEP 1. Starting on wet hair, apply a pea-size amount of gel or curl creme to your fingertips.
STEP 2. Use your fingers to twist each strand into place, following your hair’s natural curl pattern.
STEP 3. Blow-dry your hair using a diffuser attachment.
STEP 4. Touch up any frizzy or straight areas with a 3/4-inch curling iron.
STEP 5. Gently run your fingers through your hair to break up the curls. Finish with hairspray.
The Look: Side-Swept Curls
Actress Connie Britton’s gorgeous curls at the 2019 Critics’ Choice Awards had Old Hollywood appeal with a modern twist. The “Dirty John” star’s effortless style highlighted her natural texture, while the deep side part elevated her loose-flowing locks.
STEP 1. Starting on wet hair, create a side part.
STEP 2. Apply a root booster to your roots.
STEP 3. Work a curl creme or mousse through the hair. Twist 1-inch sections of hair in opposite directions to activate your natural texture.
STEP 4. Blow-dry the hair using a diffuser attachment.
STEP 5. Touch-up any straight or frizzy areas with a 1-inch curling iron. Finish with hairspray.
The Look: Top Knot
Hair in desperate need of a wash? Follow actress Yara Shahidi’s lead and conceal dirty roots with a cute topknot. The easy-to-achieve, half-up, half-down style showcases natural texture, but also hides greasy, flat-looking strands.
STEP 1. Divide the hair into two sections.
STEP 2. Pull the hair at the crown into a ponytail and secure it with a hair elastic.
STEP 3. Wrap the ends of the ponytail into a bun at the top of the head and pin it in place.
STEP 4. Gently tug at the bun to add volume.
STEP 5. Wet the bottom section of the hair with a spray bottle, then apply a curl cream or gel from mid-lengths to ends. Scrunch the hair to reactivate your natural curl pattern.
STEP 6. Air-dry or blow-dry the hair using a diffuser attachment. Finish with a shine-boosting serum.
The Look: Voluminous Side Braid
In this step-by-step tutorial, Martin Emmenegger creates the most beautiful undone braid. Pair this sweet plait with a dash of red or pink lipstick, throw on your favorite ensemble and make an entrance - in the best boho way you know how! See his steps below or follow along with the video to see Martin effortlessly move through the steps. This is one braid you'll want to add to your arsenal.
STEP 1. For maximum shine and grip, prepare the hair with PAUL MITCHELL Sculpting Foam und and blow dry it with PAUL MITCHELL Express Ion Round L.
STEP 2. Set the hair starting in the front using the PAUL MITCHELL Neuro Unclipped Rod. Before you set the hair give it a little tease at the roots for more texture. Clip each strand for cooling down. – *Pro tip: for heat protection use PAUL MITCHELL Hot Off The Press to prime the hair before heat work.
STEP 3. Open the back and polish the ends by using some drops of PAUL MITCHELL Awapuhi Wild Ginger Styling Treatment Oil, bring the hair to the left or right side and start with a 2 strand rope braid. In the middle of the strand-switch to a classic three-strand braid. Then, fix ends with an elastic.
STEP 4. Losen the braid by pancaking sections of the braid to give it a voluminous, undone look.
STEP 5. Open the rest of the hair give a little backcomb with your PAUL MITCHELL 413 Sculpting Brush bring all the hair back away from the face and fix it with bobby pins into the braid.
STEP 6. For the perfect hold finish your look with PAUL MITCHELL Extra Body Finishing Spray.
Be sure to stalk Martin on Bangstyle and keep scrolling to see part 2 to see how he turns this braid into a more polished look.
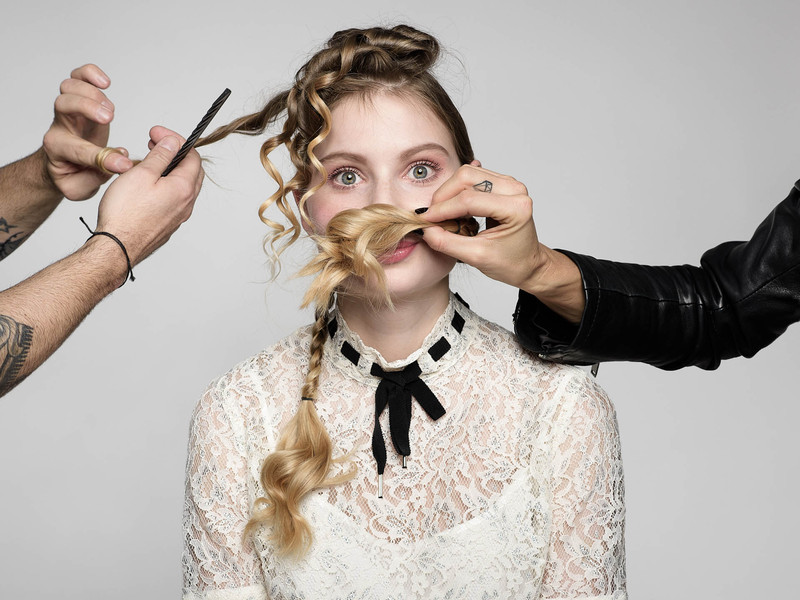
The Look: Braid Tales
In part two of this adorable tutorial, Martin Emmenegger shows us how to take the romantic braid a step further and turn it into a polished look, worthy of any editorial. We have a feeling we'll be seeing this style on the streets very soon! Follow the steps to get the look and recreate the look yourself.
STEP 1. For maximum shine and grip prepare the hair with PAUL MITCHELL Sculpting Foam und and blow dry it with the PAUL MITCHELL Express Ion Round L.
STEP 2. On the top of the head clip a horseshoe section away. Split the rest of the hair into 2 sections a big zigzag part down the back of the head.
STEP 3. For maximum shine add some PAUL MITCHELL Gloss Drops to both sections and do a regular tight 3 strand braid on both sections. Fix it with an elastic and make sure that you have about 10cm of hair not braided left over.
STEP 4. Open the horseshoe section and set the hair with your PAUL MITCHELL Neuro Small Styling Cone to add a wavy-curly texture. Repeat the same technique also at the ends of the braids. Use PAUL MITCHELL Hot Off The Press for heat protection.
STEP 5. Give your horseshoe section a little brush through to expand your texture and do a soft airy backcomb with your PAUL MITCHELL 413 Sculpting Brush. Roll the hair under and fix it with bobby pins. Make sure that some strands will fall into the face.
STEP 6. Backcomb the ends of the braids.
STEP 7. For perfect hold finish your look with PAUL MITCHELL Hold Me Tight.
Credits: Hair: Martin Emmenegger, Makeup: Jana Mueller, Photos: Beat Steffen, Model: Billie-Jean Harper