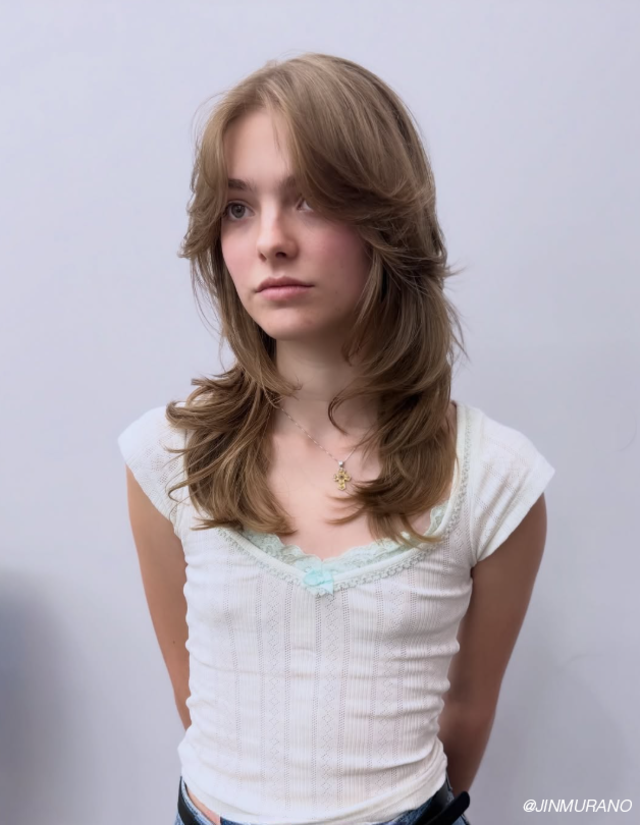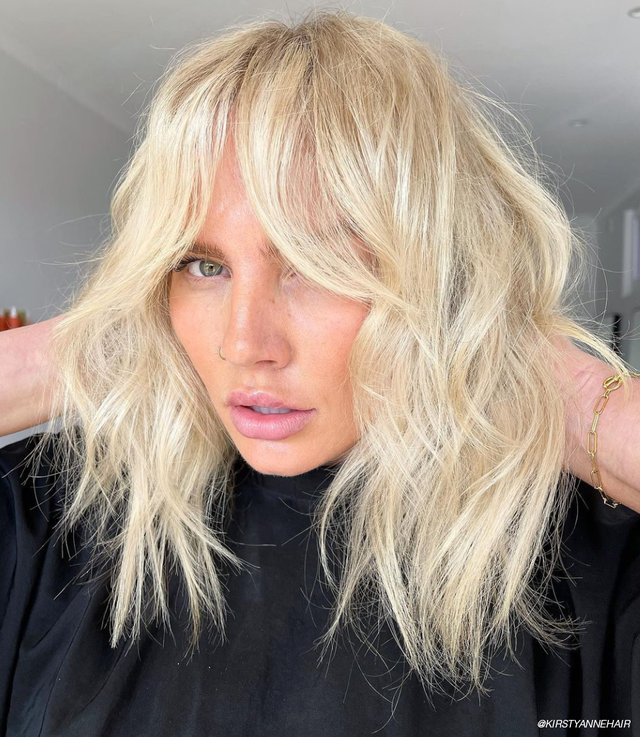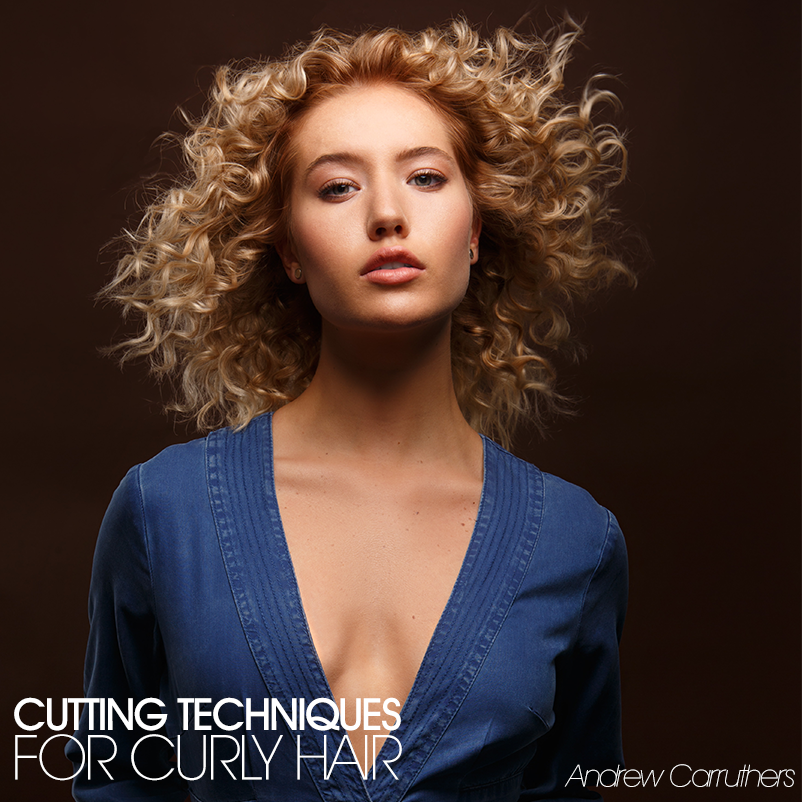
Curly hair is such a beautiful texture to work with, but there are a few differences in the way in which you cut it to create a look that is dynamic in styling. Andrew Carruthers, Director of Education for Sam Villa walks us through his best techniques and tips for cutting curly hair to be worn curly versus straight.
“When a guest wants the ability to transition from naturally curly to a straight finish, it creates a unique challenge for the hairdresser, because naturally curly hair benefits from more deliberate blunt pieces so the “ends have friends.” If the ends are overly softened through texturizing, it hinders the curl from forming complete tendrils, which leaves hair looking frizzy. This more deliberate approach could leave the hair looking a bit chunky when styled straight, so here in lies the challenge when a guest wants to have the versatility of both looks,” he says.
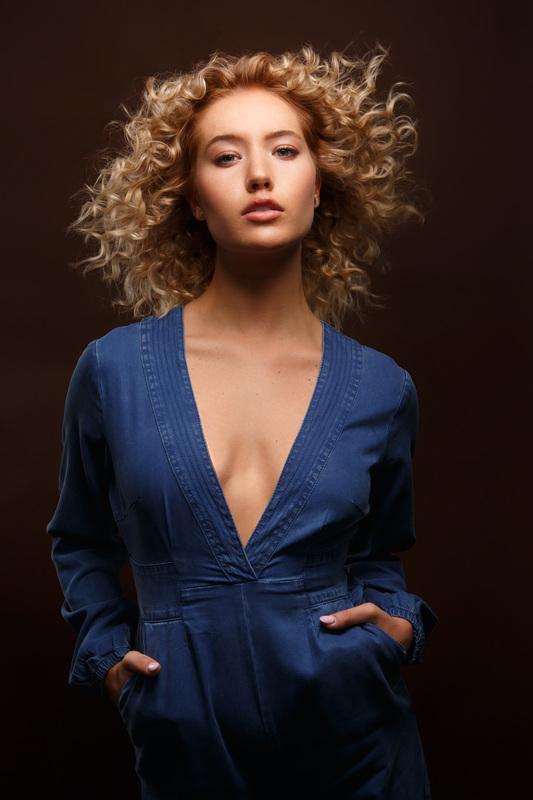
This haircut has a careful balance of weighted ends with a dash of softness to allow for an effortless transition from a natural curl to a straight finish. Begin with the intention of your guest wearing the hair with its natural curl. To begin the process, head to the shampoo bowl first:
· For very thirsty hair, rinse completely and begin with applying Redken Curvaceous Conditioner for curly and wavy hair… that’s right, condition first! Start product at the ends and rake fingers through hair to loosen tangles.
· Apply Redken Curvaceous low foam moisturizing cleanser right over top of the conditioner and continue raking through the hair with fingers. Avoid scrubbing or circular motion as it roughs up the curl and adds tangles. Rinse thoroughly and condition one more time.
· Carefully squeeze excess water from hair - use a smooth textured towel or t-shirt versus terry cloth to preserve the curl.
· Apply Redken Curvaceous Full Swirl curly and wavy hair cream serum throughout, again using a raking motion with fingers only.
· Ask guest to lean forward and flip their hair upside down, squeeze curl pattern in with smooth towel or t-shirt, diffuse with the Sam Villa Light Professional Ionic Blow Dryer with diffuser attachment until 100% dry, staying focused on each area and minimizing unwanted movement to keep curl intact.
· Begin haircut by carefully sectioning the first tier at about mid-occipital with a horizontal section.
· Address each curl individually, elevate to 90 degrees horizontal, no overdirection, and simply create density on the ends by cutting a diagonal line with the Sam Villa Signature Series 7” Dry Cutting Shear. By cutting a diagonal, the ends still have the density for the curl but will blow out softer for the polished finish. Cutting curl in this manner is a very visual exercise, there is no guide, it’s just cut to fit the silhouette
· The next tier follows the vertical round of the head. Repeat the steps above, visually checking for balance.
· On the final tier above the round of the head, take each curl 90 degrees vertical and cut some of the pieces at the crown slightly shorter to take away weight from the upper surface.
Once the silhouette looks flawless in it’s curly shape, rinse the head thoroughly and wrap dry smooth with the Sam Villa Signature Series Paddle Brush or light tension. Look for a polish to the hair, but not perfectly straight. A slight bend to the hair will help so that the more blunt ends don’t need to be overly softened to fit a polished finish.
· Take large vertical sections from the high point of the head to the hairline, elevate to the same elevations used while cutting the curls, and look for any pieces that are really far out of balance.
· Use a strong diagonal “peak and valley” point cut technique to bring these pieces closer in balance with the rest of the section – don’t go for perfection, just better balance.
· If there are areas that need weight removed to look better in the polished form, hold those areas at the same elevation they were cut, place shear in towards the mid shaft with points going away from head and “talk” the shear down the section towards the ends being careful to leave strength on the ends.
· For the fringe, take pieces that are naturally falling into the fringe area, hold them at low elevation; pinch the ends just past the eyebrows and cut. This step may not fit depending on how tight the guests curl pattern develops.
“The ability to establish a successful and loyal clientele is truly about the value created in the experience. Offering guests the extra steps involved in this process promises a versatility most will never experience…and loyalty for life,” adds Carruthers.
For more tips, tricks and hair solutions be sure to follow @SamVillaHair on Instagram and Bangstyle!