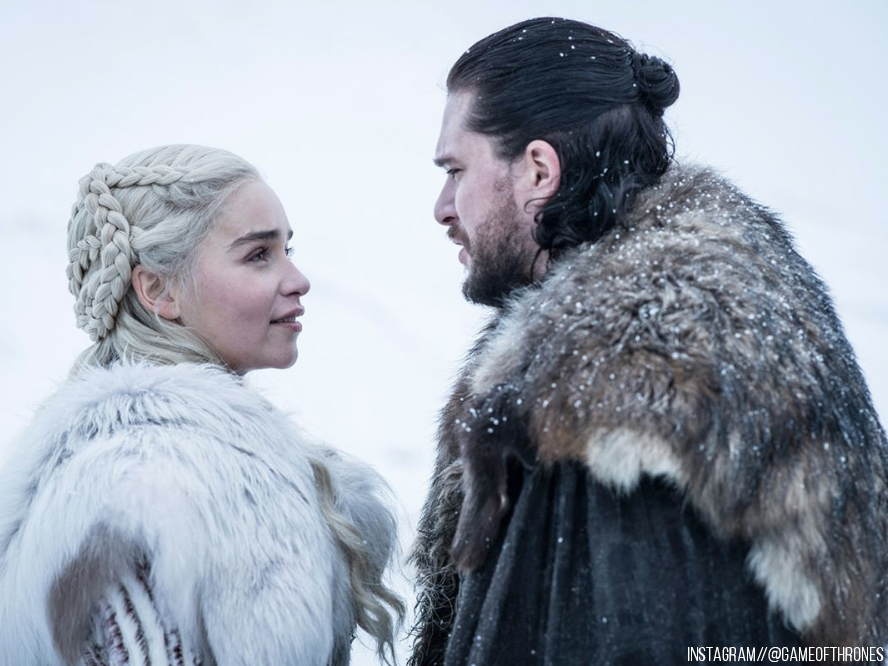
Winter is coming and hopefully, we’ll finally find out if Jon Snow knows anything! While many of us are binge watching past seasons to make sure we remember every little detail of HBO's Game Of Thrones, most of us are falling in love with the characters and their intricacies all over again. From fangirling over Arya Stark to swooning over Ygritte and Jon Snow's love affair and giggling at Hodor's uncanny timing and ability to turn his one and only word into a character. The end of the last season left us all with a bit of uncertainty as we all gasped and held our breath in the final moments. Curious about what will become of Daenerys Targaryen? One thing is for certain, we’ve been following her hair since the beginning. As an ode to the final season, we’re giving you the how-to for a Khaleesi-like braid! Keep reading to see how to get the look just in time for the premiere!
Create some enthusiasm out on the salon floor with this simple trick to create an intricate braid that will have not only your guests in awe but have your fellow stylists asking you how you created this look!
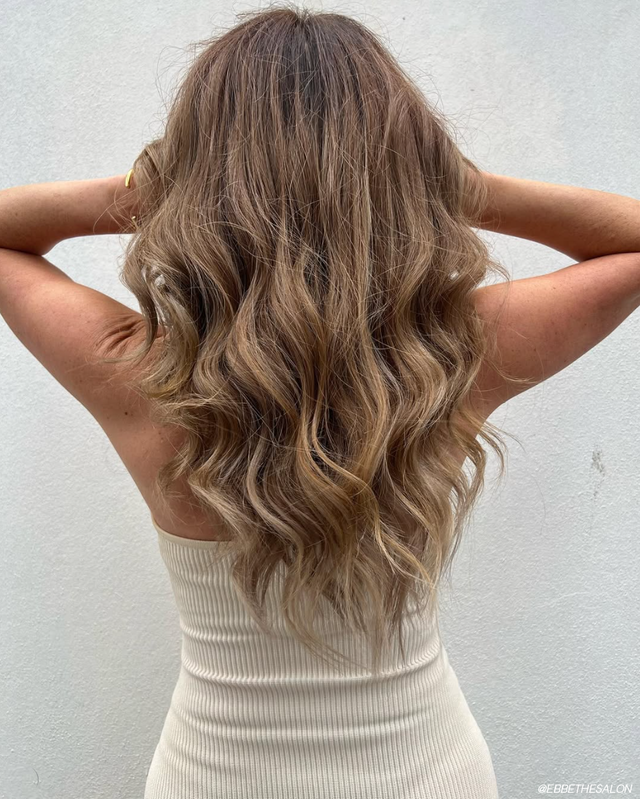
Being a huge fan of the show Game Of Thrones myself, let me introduce you to a braid I love to call, Khaleesi. A beautiful and intricate-looking braid that is created simply by tying knots!
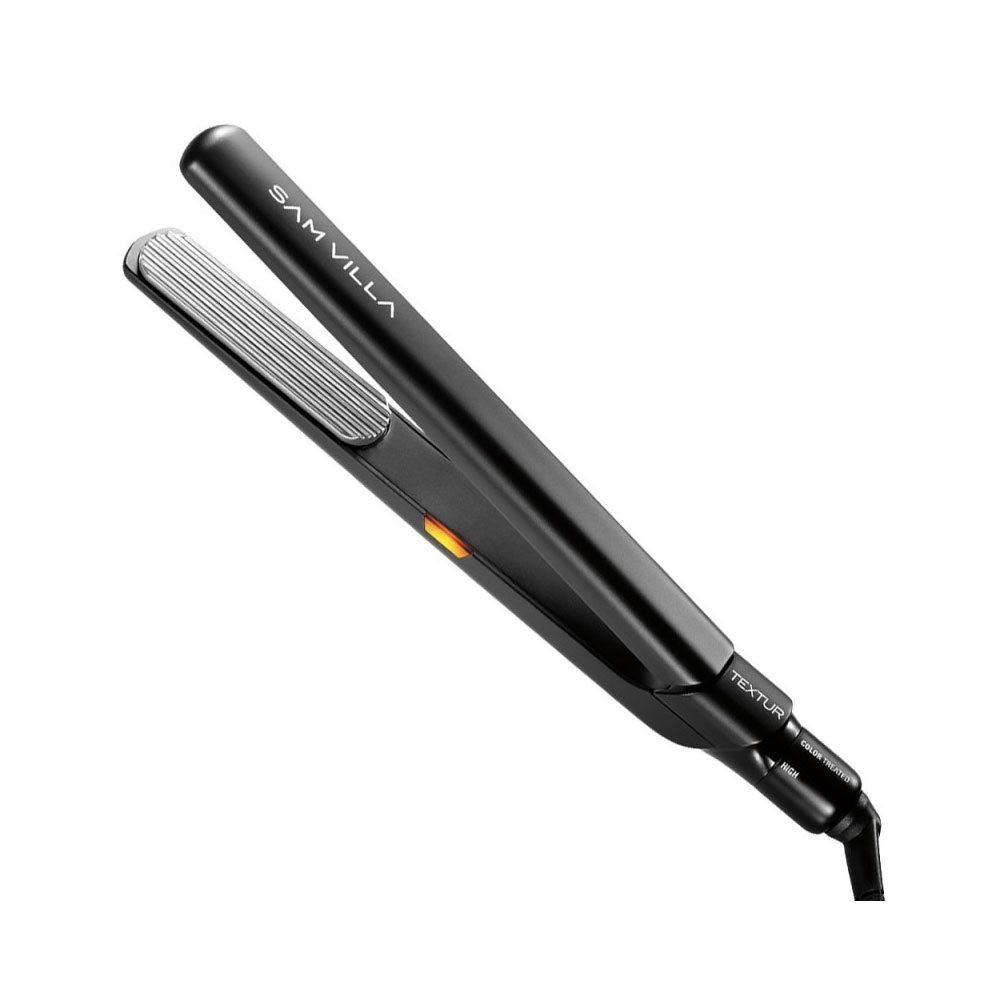
NOTE: We recommend prepping the hair with the Sam Villa Signature Series Textur Iron. Not only will this create texture for the braid, but it will add pliability and grip to the hair.
Now let's start tying knots!
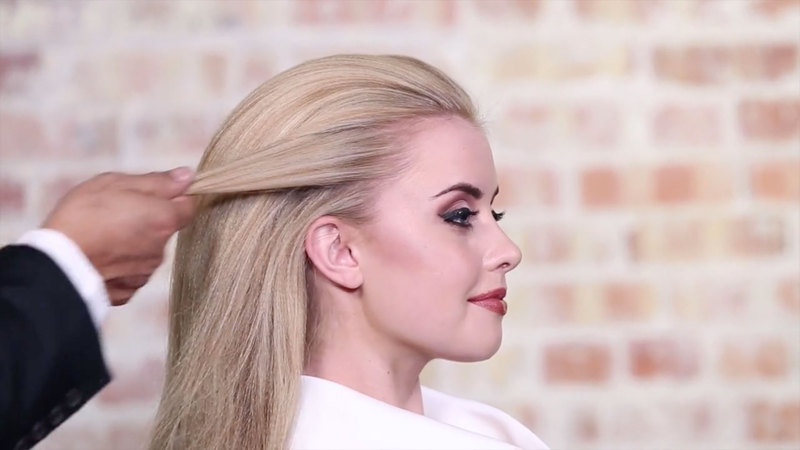
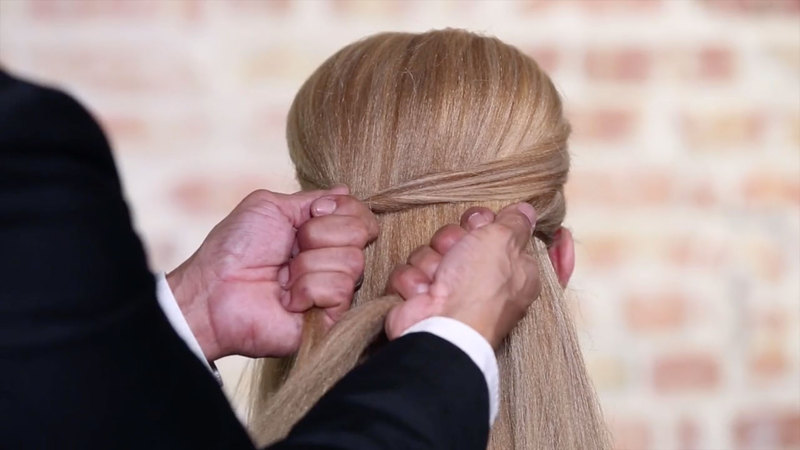
Grab a section about an inch thick beginning at the top of the ear. Take an identical section on the opposite side of the head as well, then gather both sections to the back of the head where we are going to start tying our knots.
Using the rhythm and method of the slip-tie braid, let's begin to tie the shoe." Check out the slip-tie braid tutorial here to understand the hand form and rhythm better.
Take one section in each hand. Making a fist, you will bring your knuckles together facing inwards. With your left hand create a peace sign, which will be your anchor. Take the section in your right hand and wrap it down and around the peace sign, pinching it with your left thumb, pull the hair through then pull the two ends vertically to tie a knot. Pull the knot that you created to the left of center and hold with yoru left hand.
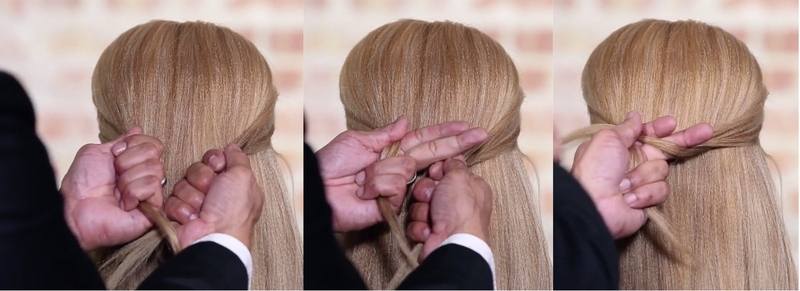
Merge all the hair that has been tied off to the left of center, into one section. Now come through and grab a section on the opposite side, just below your first section. Making the right hand the action hand, you will again bring your knuckles together, create the anchor, wrap, pull and tie vertically, but this time tying it to the right of center.
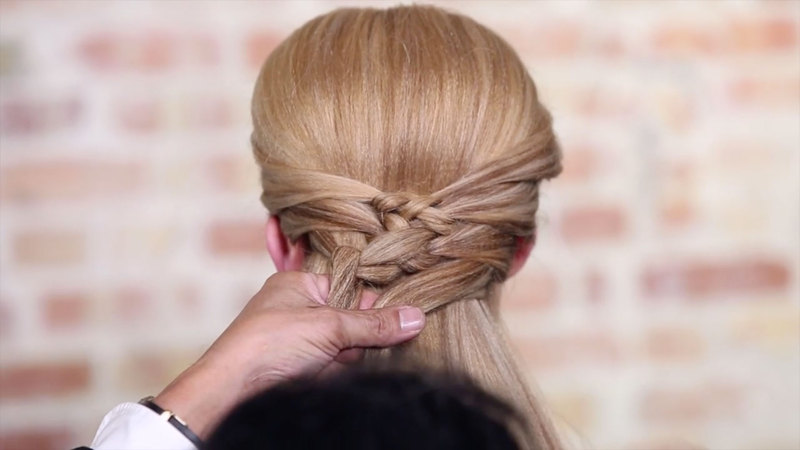
Now merge the hair again, grabbing a section from the left-hand side and begin creating your knot. When tying the knot, you will always do so to the right or left of center depending on which side you tie the knot. Continue to add hair and tie vertical knots until as you work down. Are you starting to feel the rhythm and see the pattern develop?
NOTE: The hand that you pick the hair up with will ALWAYS be your action hand.
Remember to always tie the knot vertically. You will notice as you work your way down, the braid will start to form a triangular shape. If your guest has layers, just merge them into the sections. Because you are tying knots, the hair will stay together.
When you get towards the end of the hair and run out of sections to grab, continue to tie the hair by alternating the action hand. You may have one section that is longer and one that is shorter, let the shorter section be your action hand, this will even out the two sections.
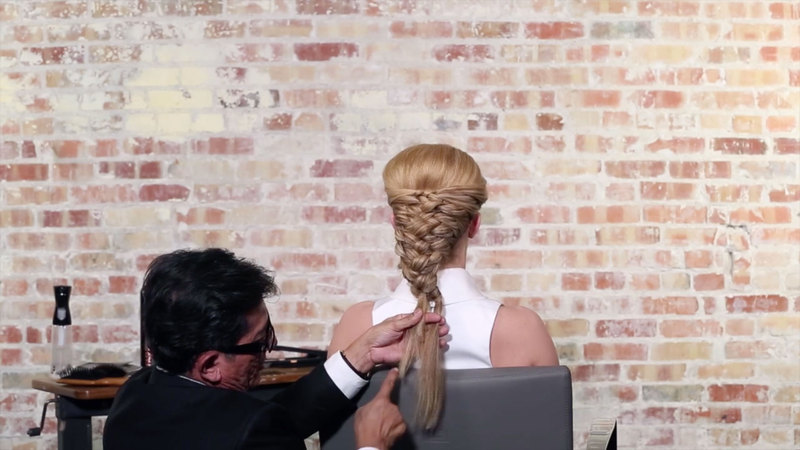
Once you get to the end, take the end and roll up then fold underneath the braid and secure with grips.
HOT TIP: A grip has a toe and a flat surface; the toe end of the grip will be what goes against the head. The toe will prevent the grip from slipping.
Come back to the front and adjust where necessary to balance the shape. Use a Redken frizz dismiss sheet to add shine back into the hair and remove any unwanted fly-aways.
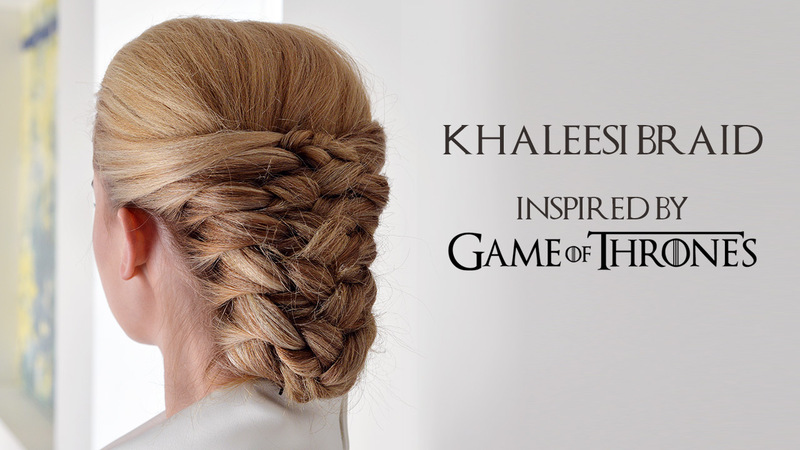
Whether you are a Game Of Thrones fan or a lover of braids (maybe you're both), this easy yet complex looking braid is one to impress anyone!
If you have any questions or comments please leave them in the box below. Make sure you join our email list and be the first to know when we release new free education!
You know that we want to see you recreate this look! Be sure to take pictures and tag your photos on Instagram with #samvilla for a chance to be featured.
For FREE education, special promotions and weekly inspiration and online workshops, be sure to sign up HERE!
Looking for even more hair care and styling tricks, be sure to stalk Sam Villa Professional on Bangstyle and check out all of his tools in the Bangstyle Store!